
Time sheets
Filling in Time Sheets

note
To enter time, navigate to the Time Sheets module.
- Verify that you can navigate by clicking on the time sheets section.
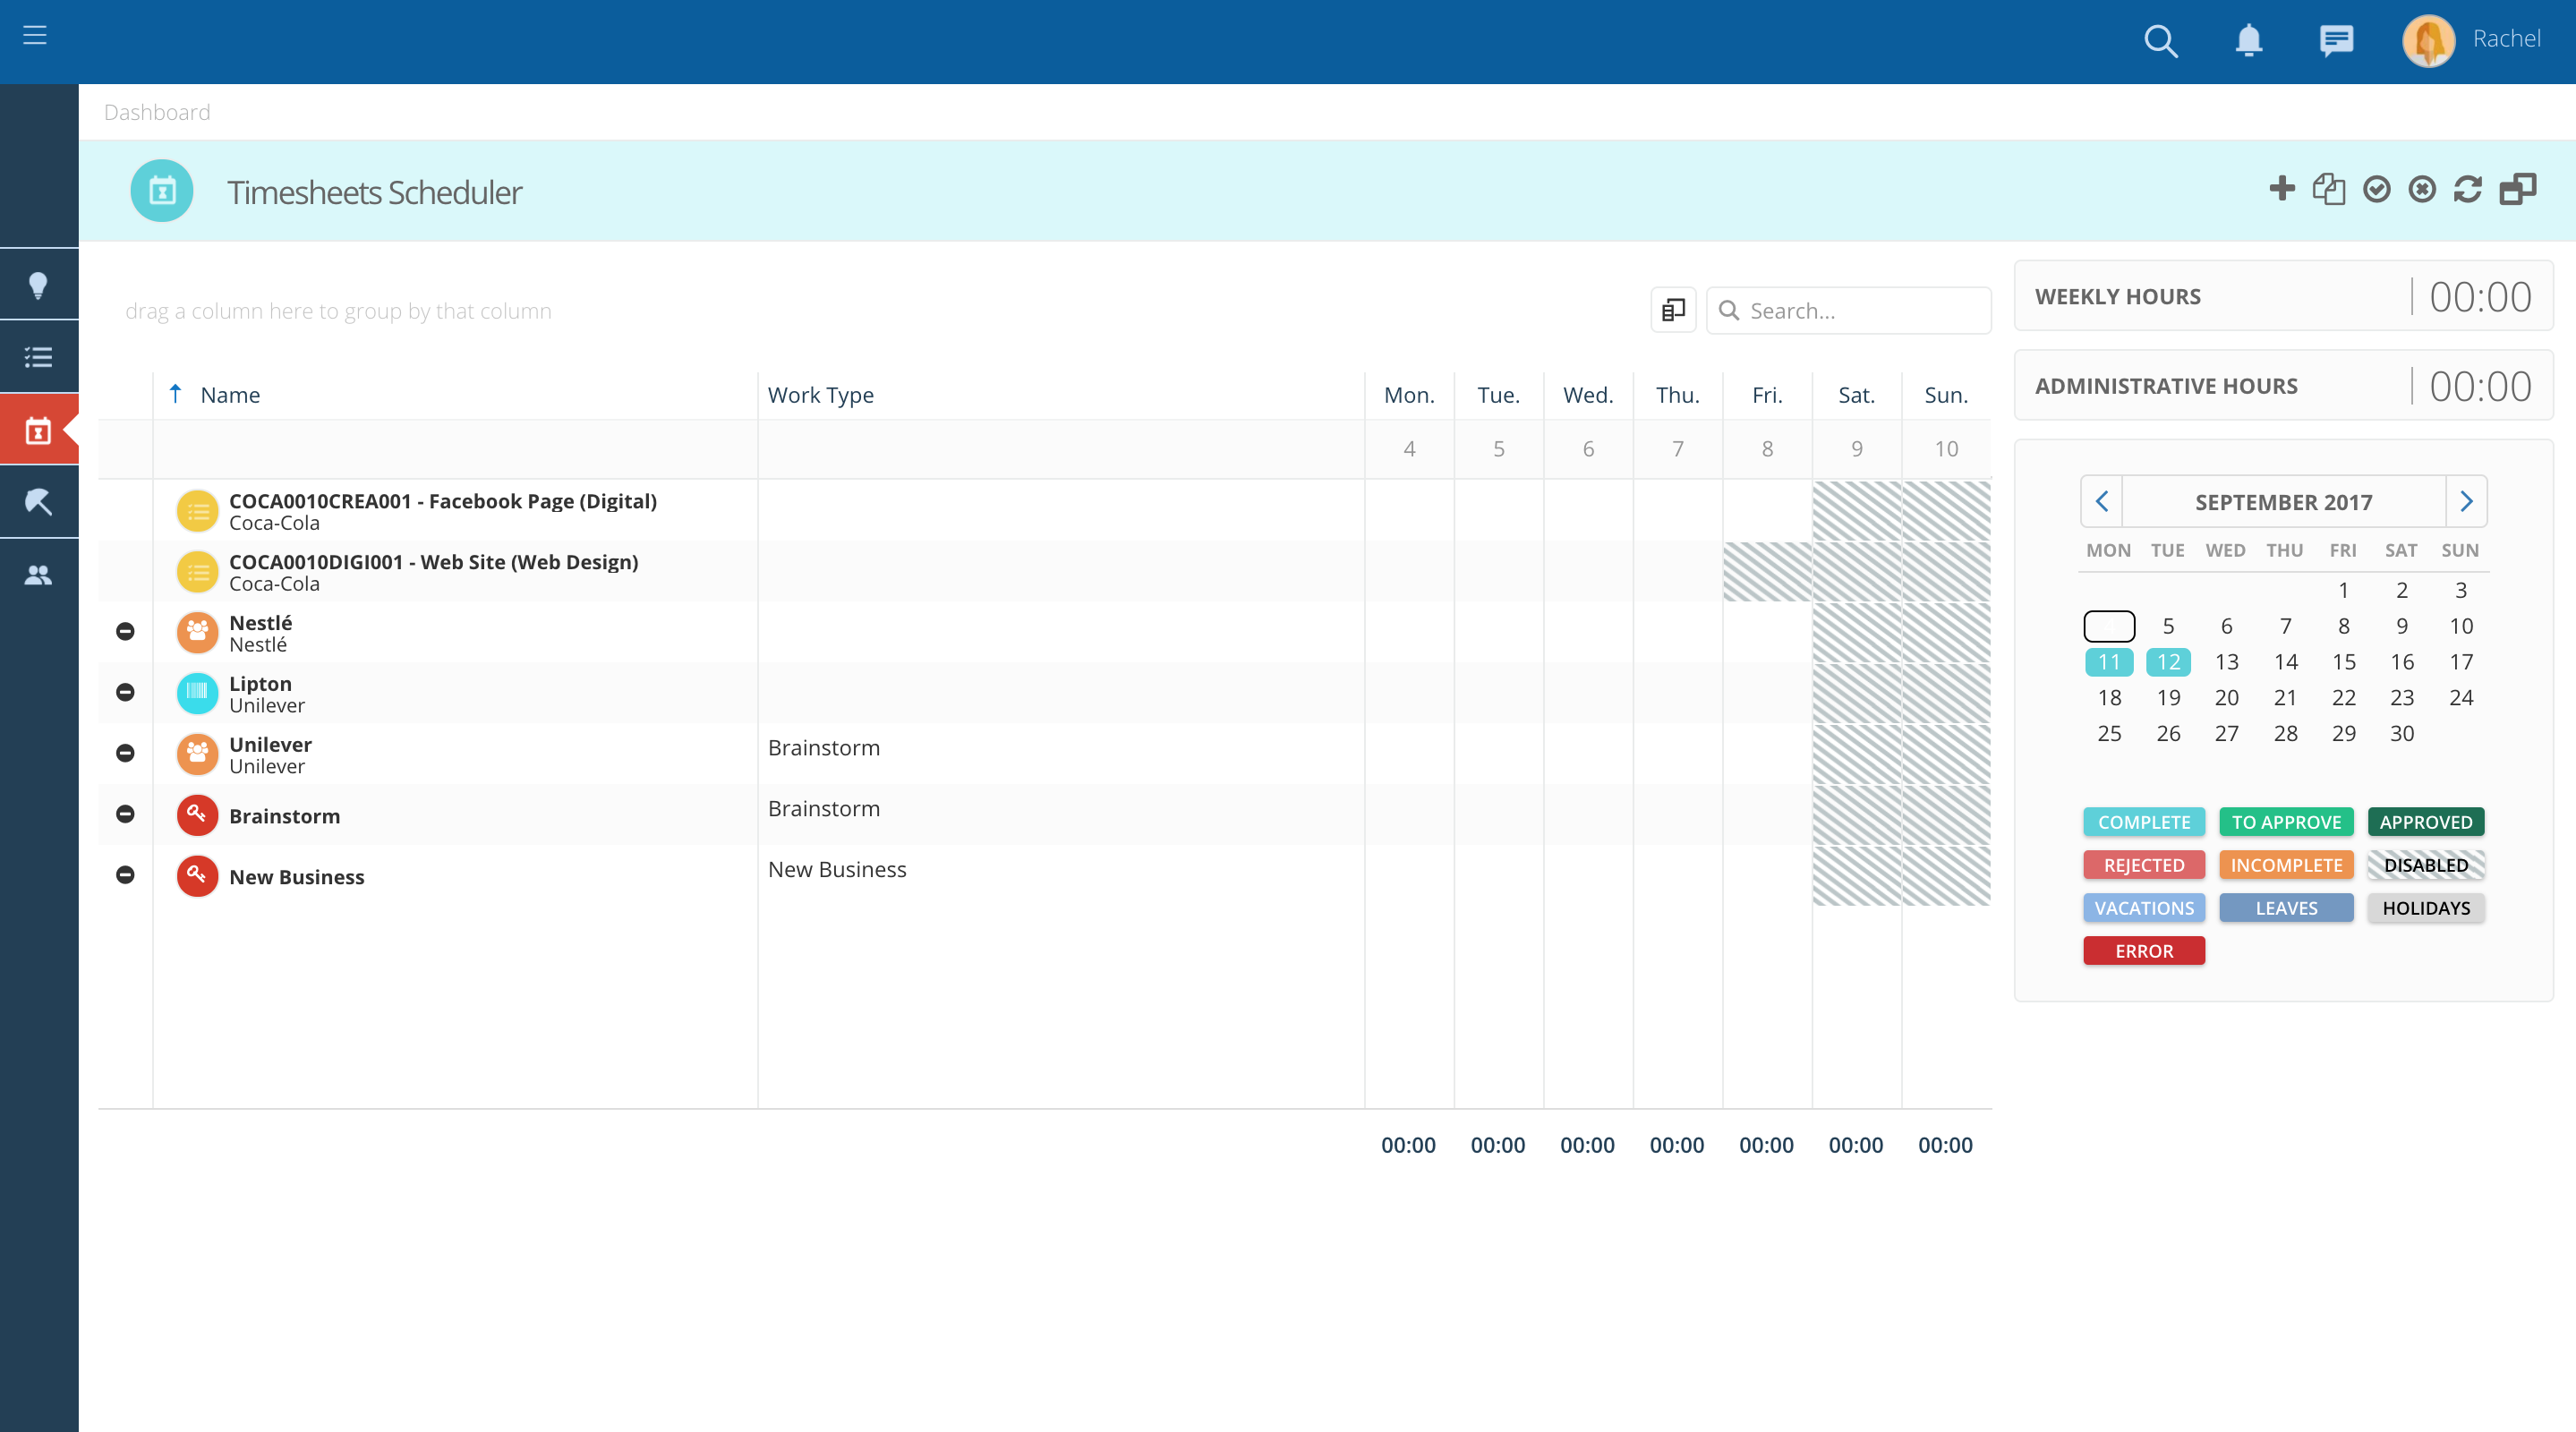
- Verify that some lines appear on your grid automatically, based on the jobs you have been assigned to.
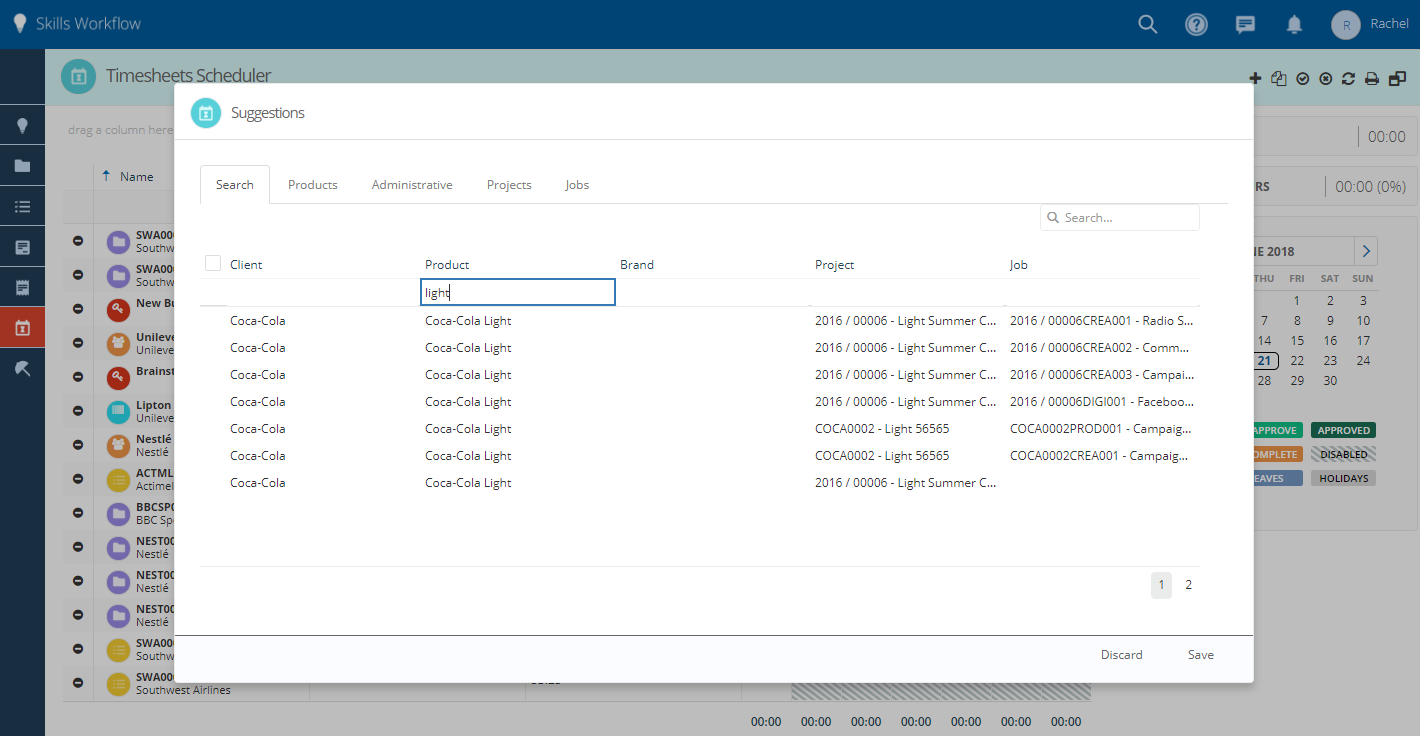
- If you are not seeing the Job or Project that you need, click on the "+" to add a new entry to your timesheet grid. A popup will open.
- Then use the search field at the top to quickly search for the job number, client name or any other key word.
- On this popup you may find different tabs, depending on your accesses.
- Each tab has a "Search" icon where you can easily filter the information.
- You can also further filter a specific field by typing in what you are looking for under each column title

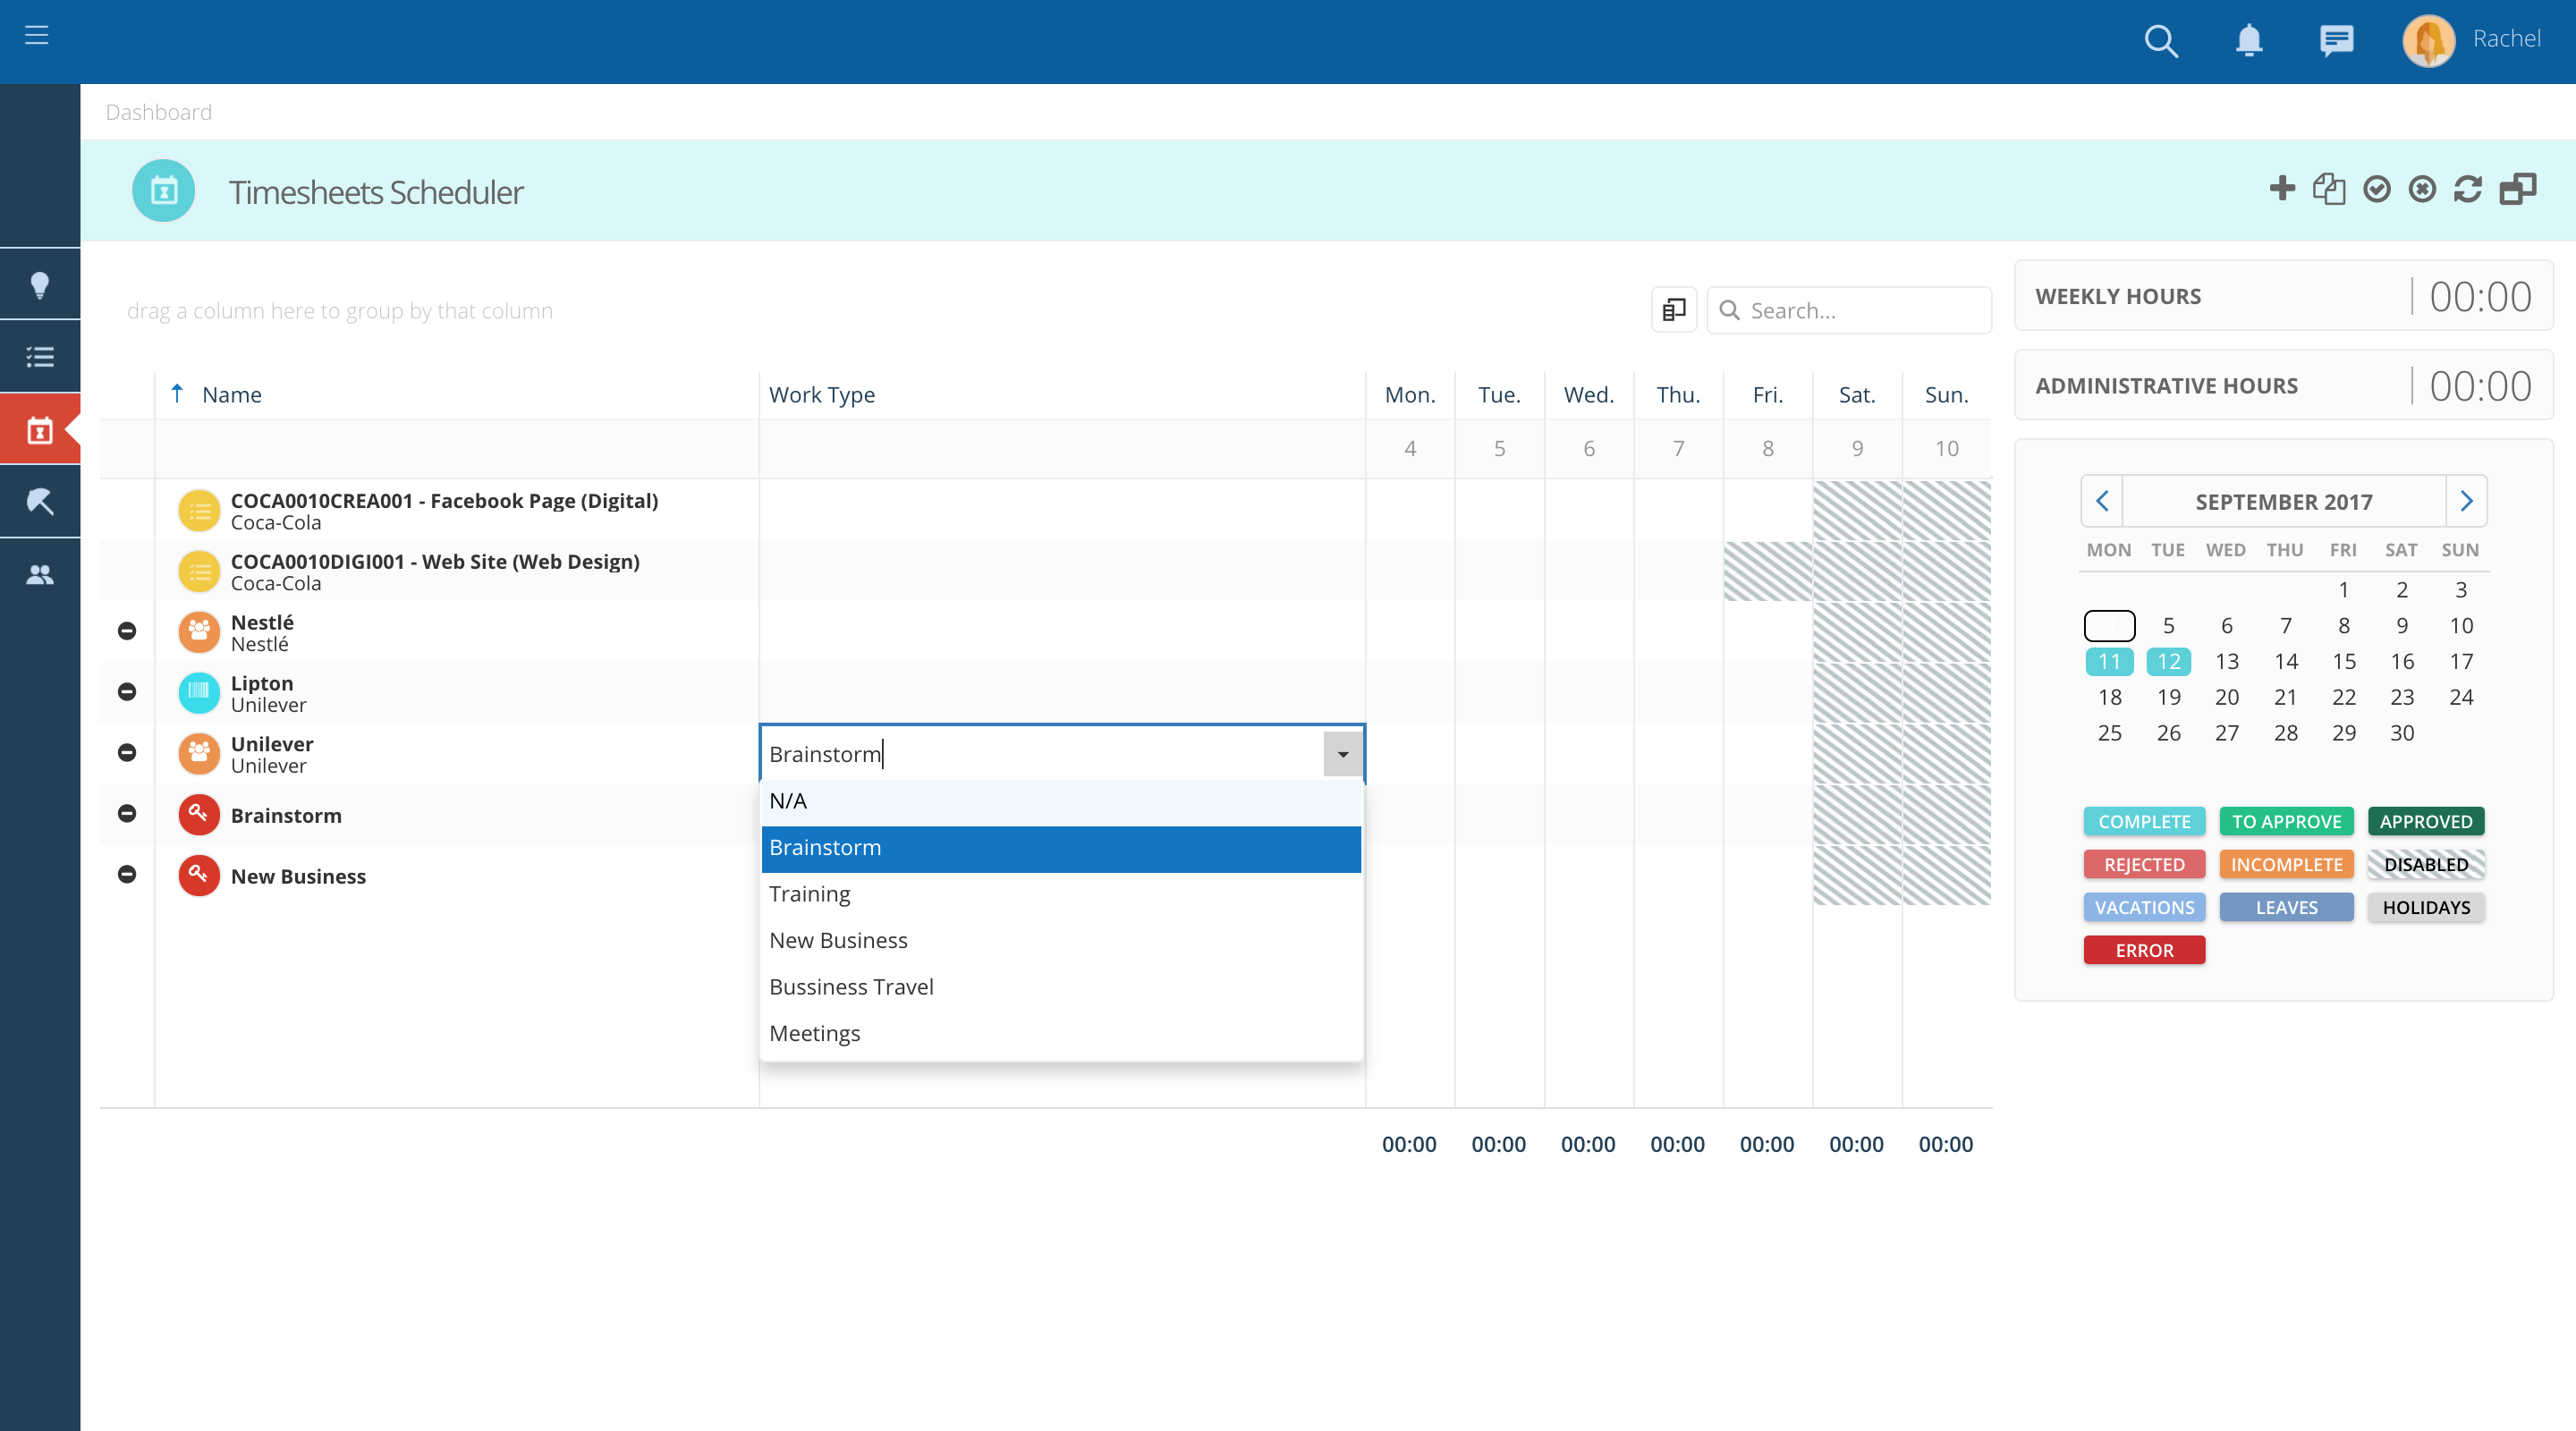
- It is possible to specify the type of activitiy you have been doing (e.g. Research, meeting, etc.) for each time entry. Go to the work type column and select the work type for each line from the drop down list.
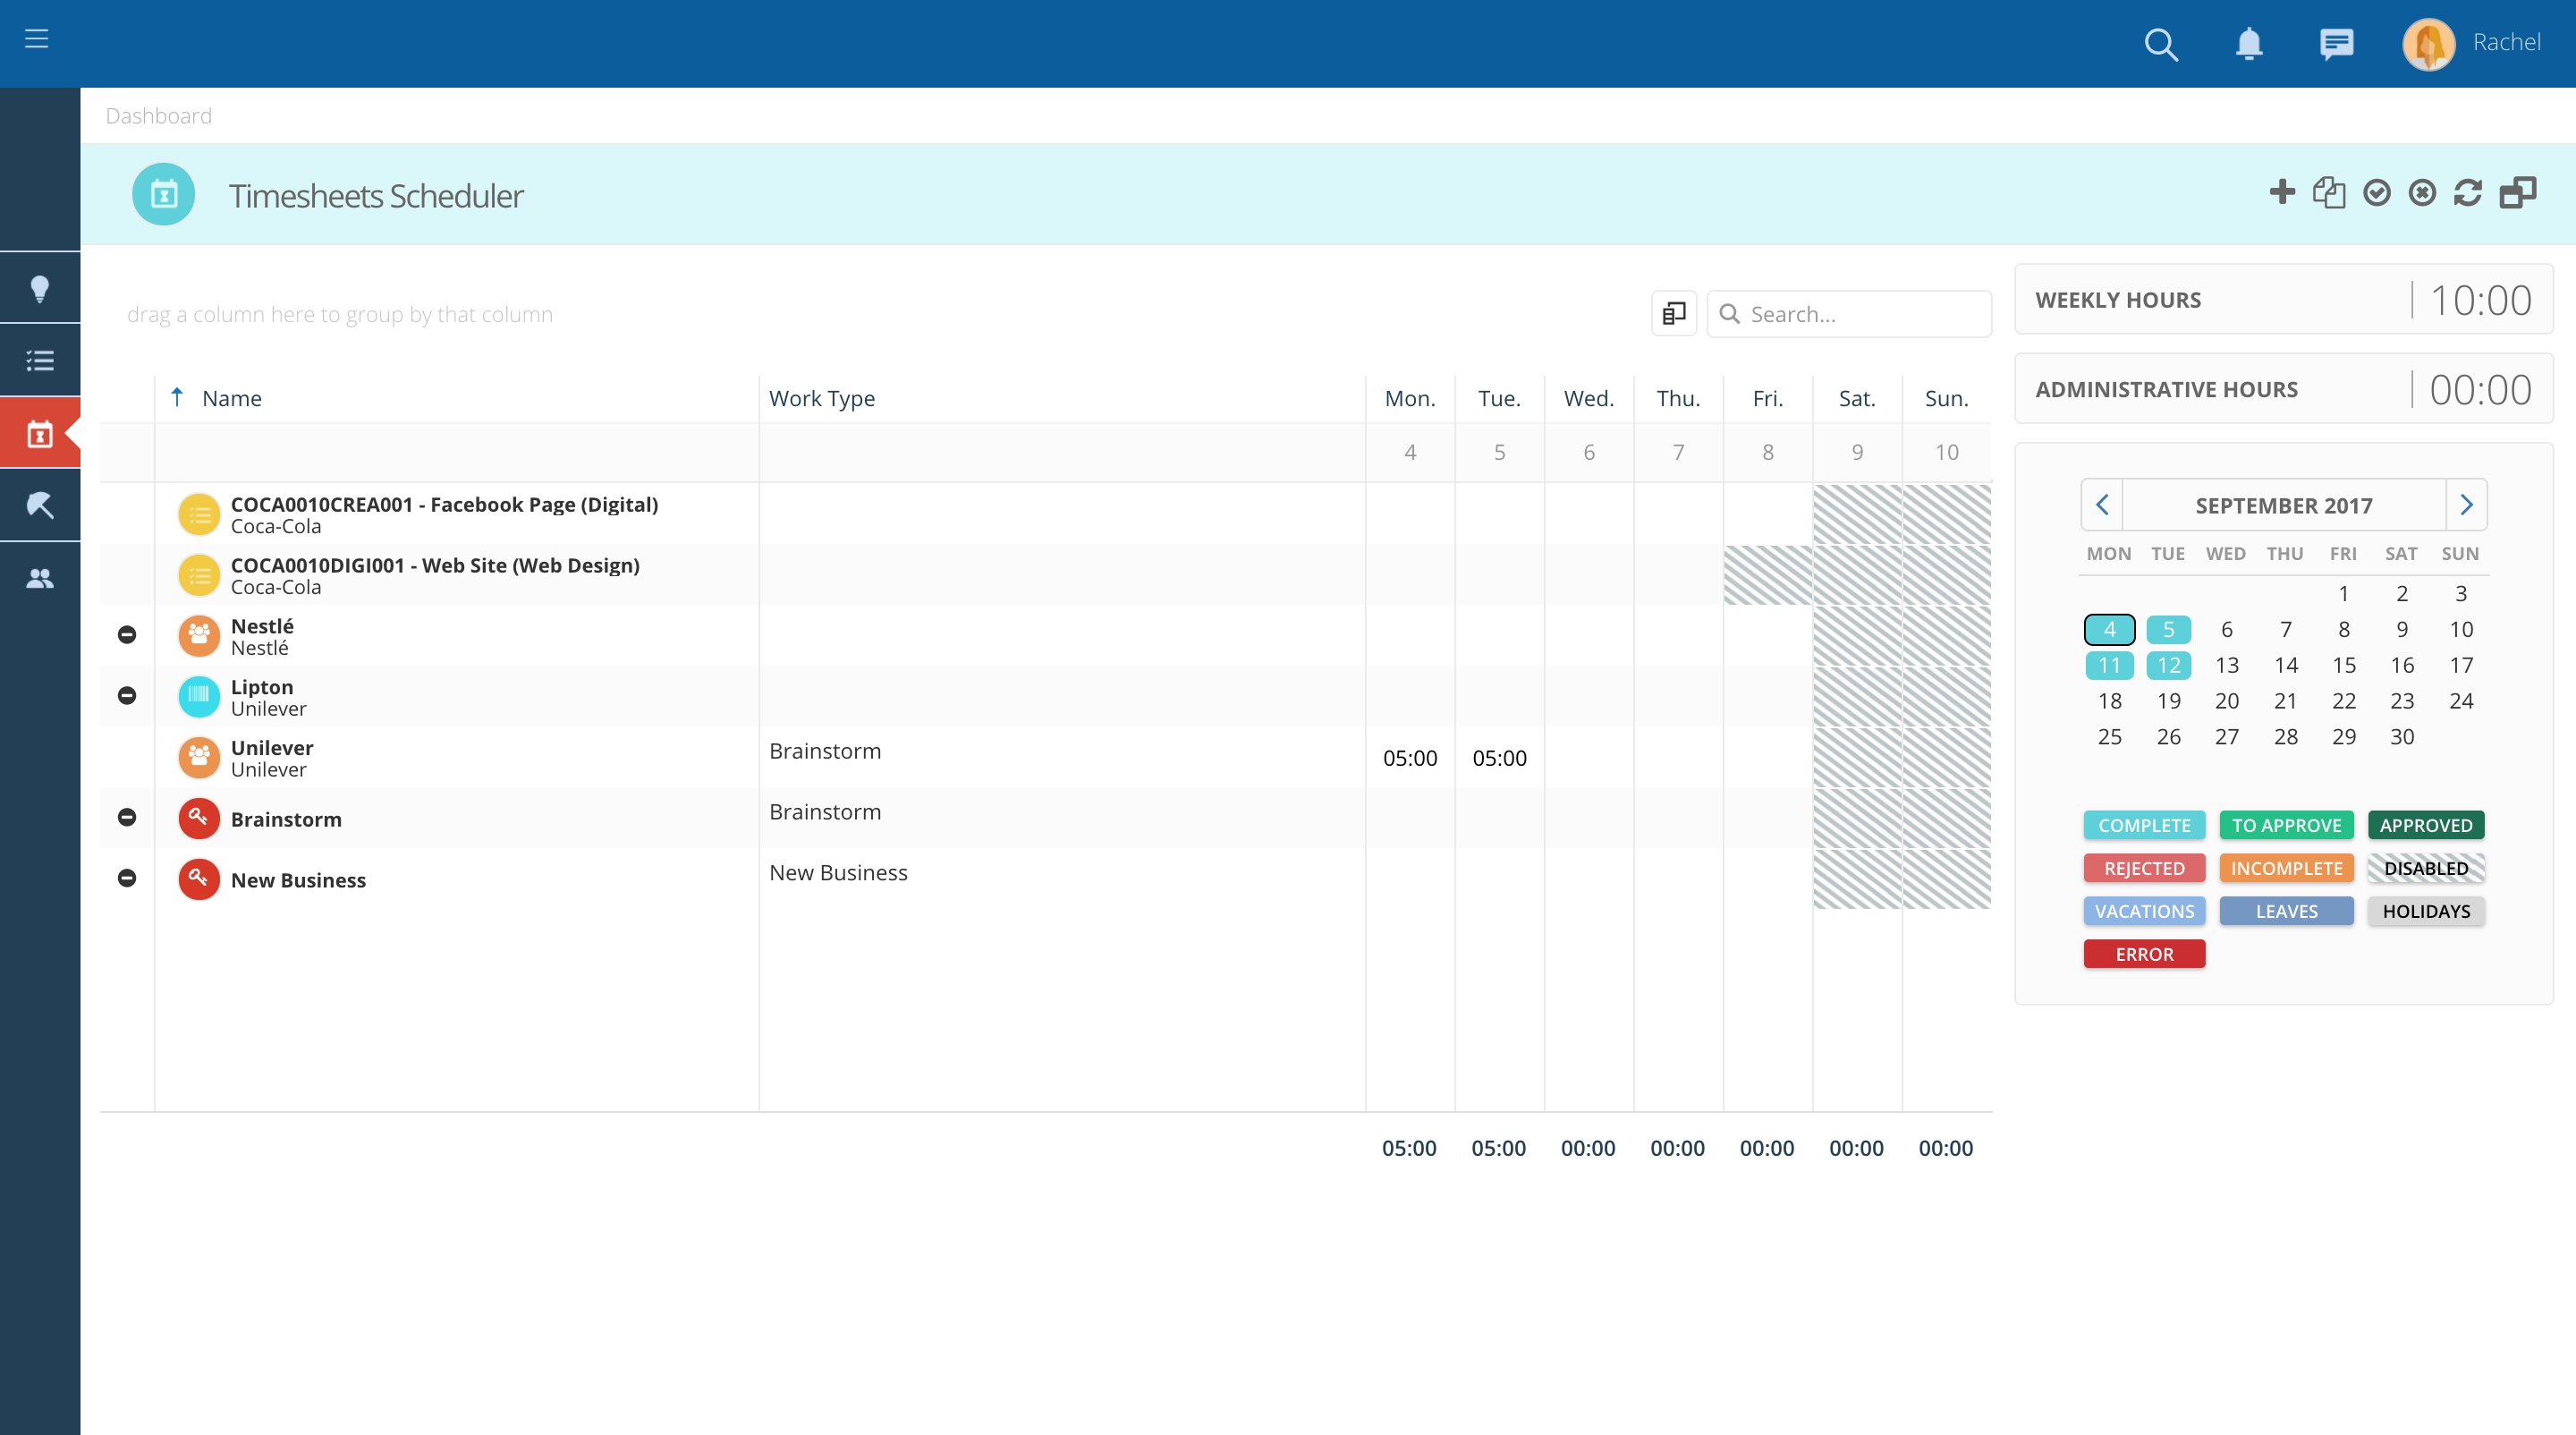
- Check that the indicators, on the right side of your timesheet, change as you enter time.
- Verify that you can add more details to your entries by clicking on the right button of your mouse and pressing "details".
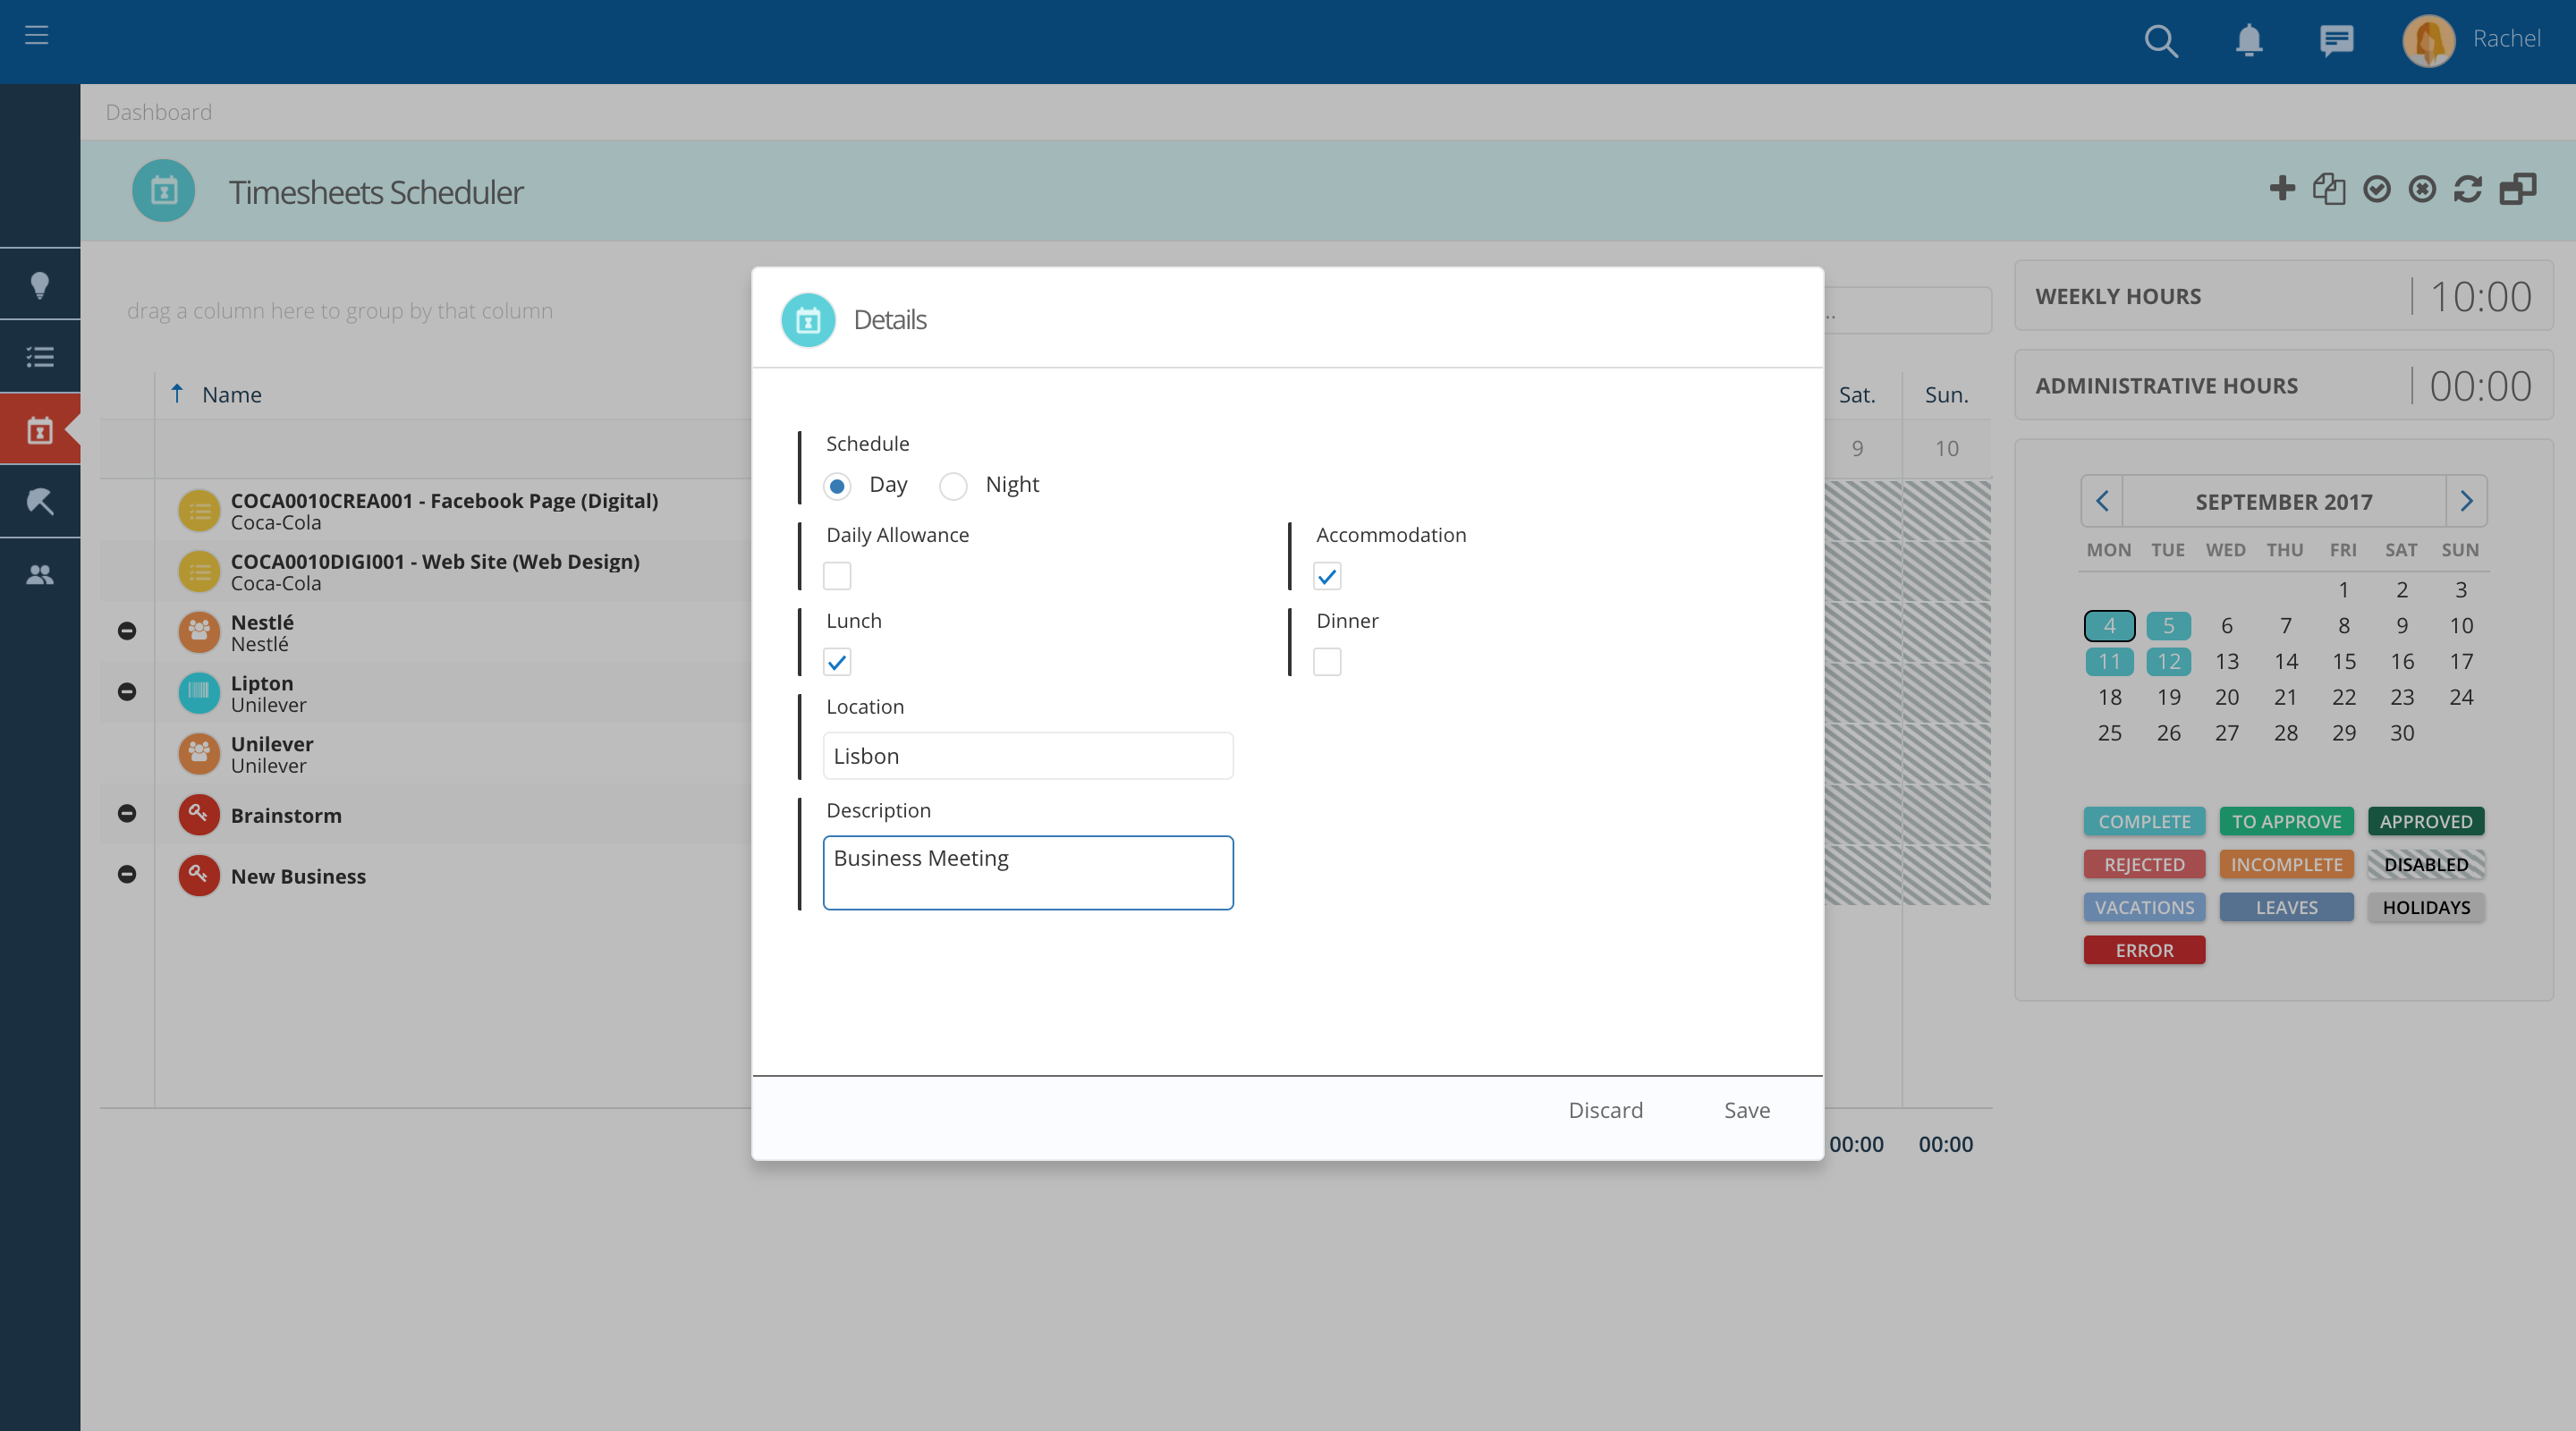
- Check that there are no red cells (invalid hours)
- These can appear if you are exceding your maximum daily hours or if you are entering time on a level that you are not allowed to (e.g. if you enter time on a Project and you are only allowed to enter time on Jobs)
- If that is the case, erase those hours and enter them again on the correct line
- Click on the "+" if the entry you need is not on your timesheet yet
- You may also be allowed or not to enter time on the weekend, holidays or leave days depending on your company's policy
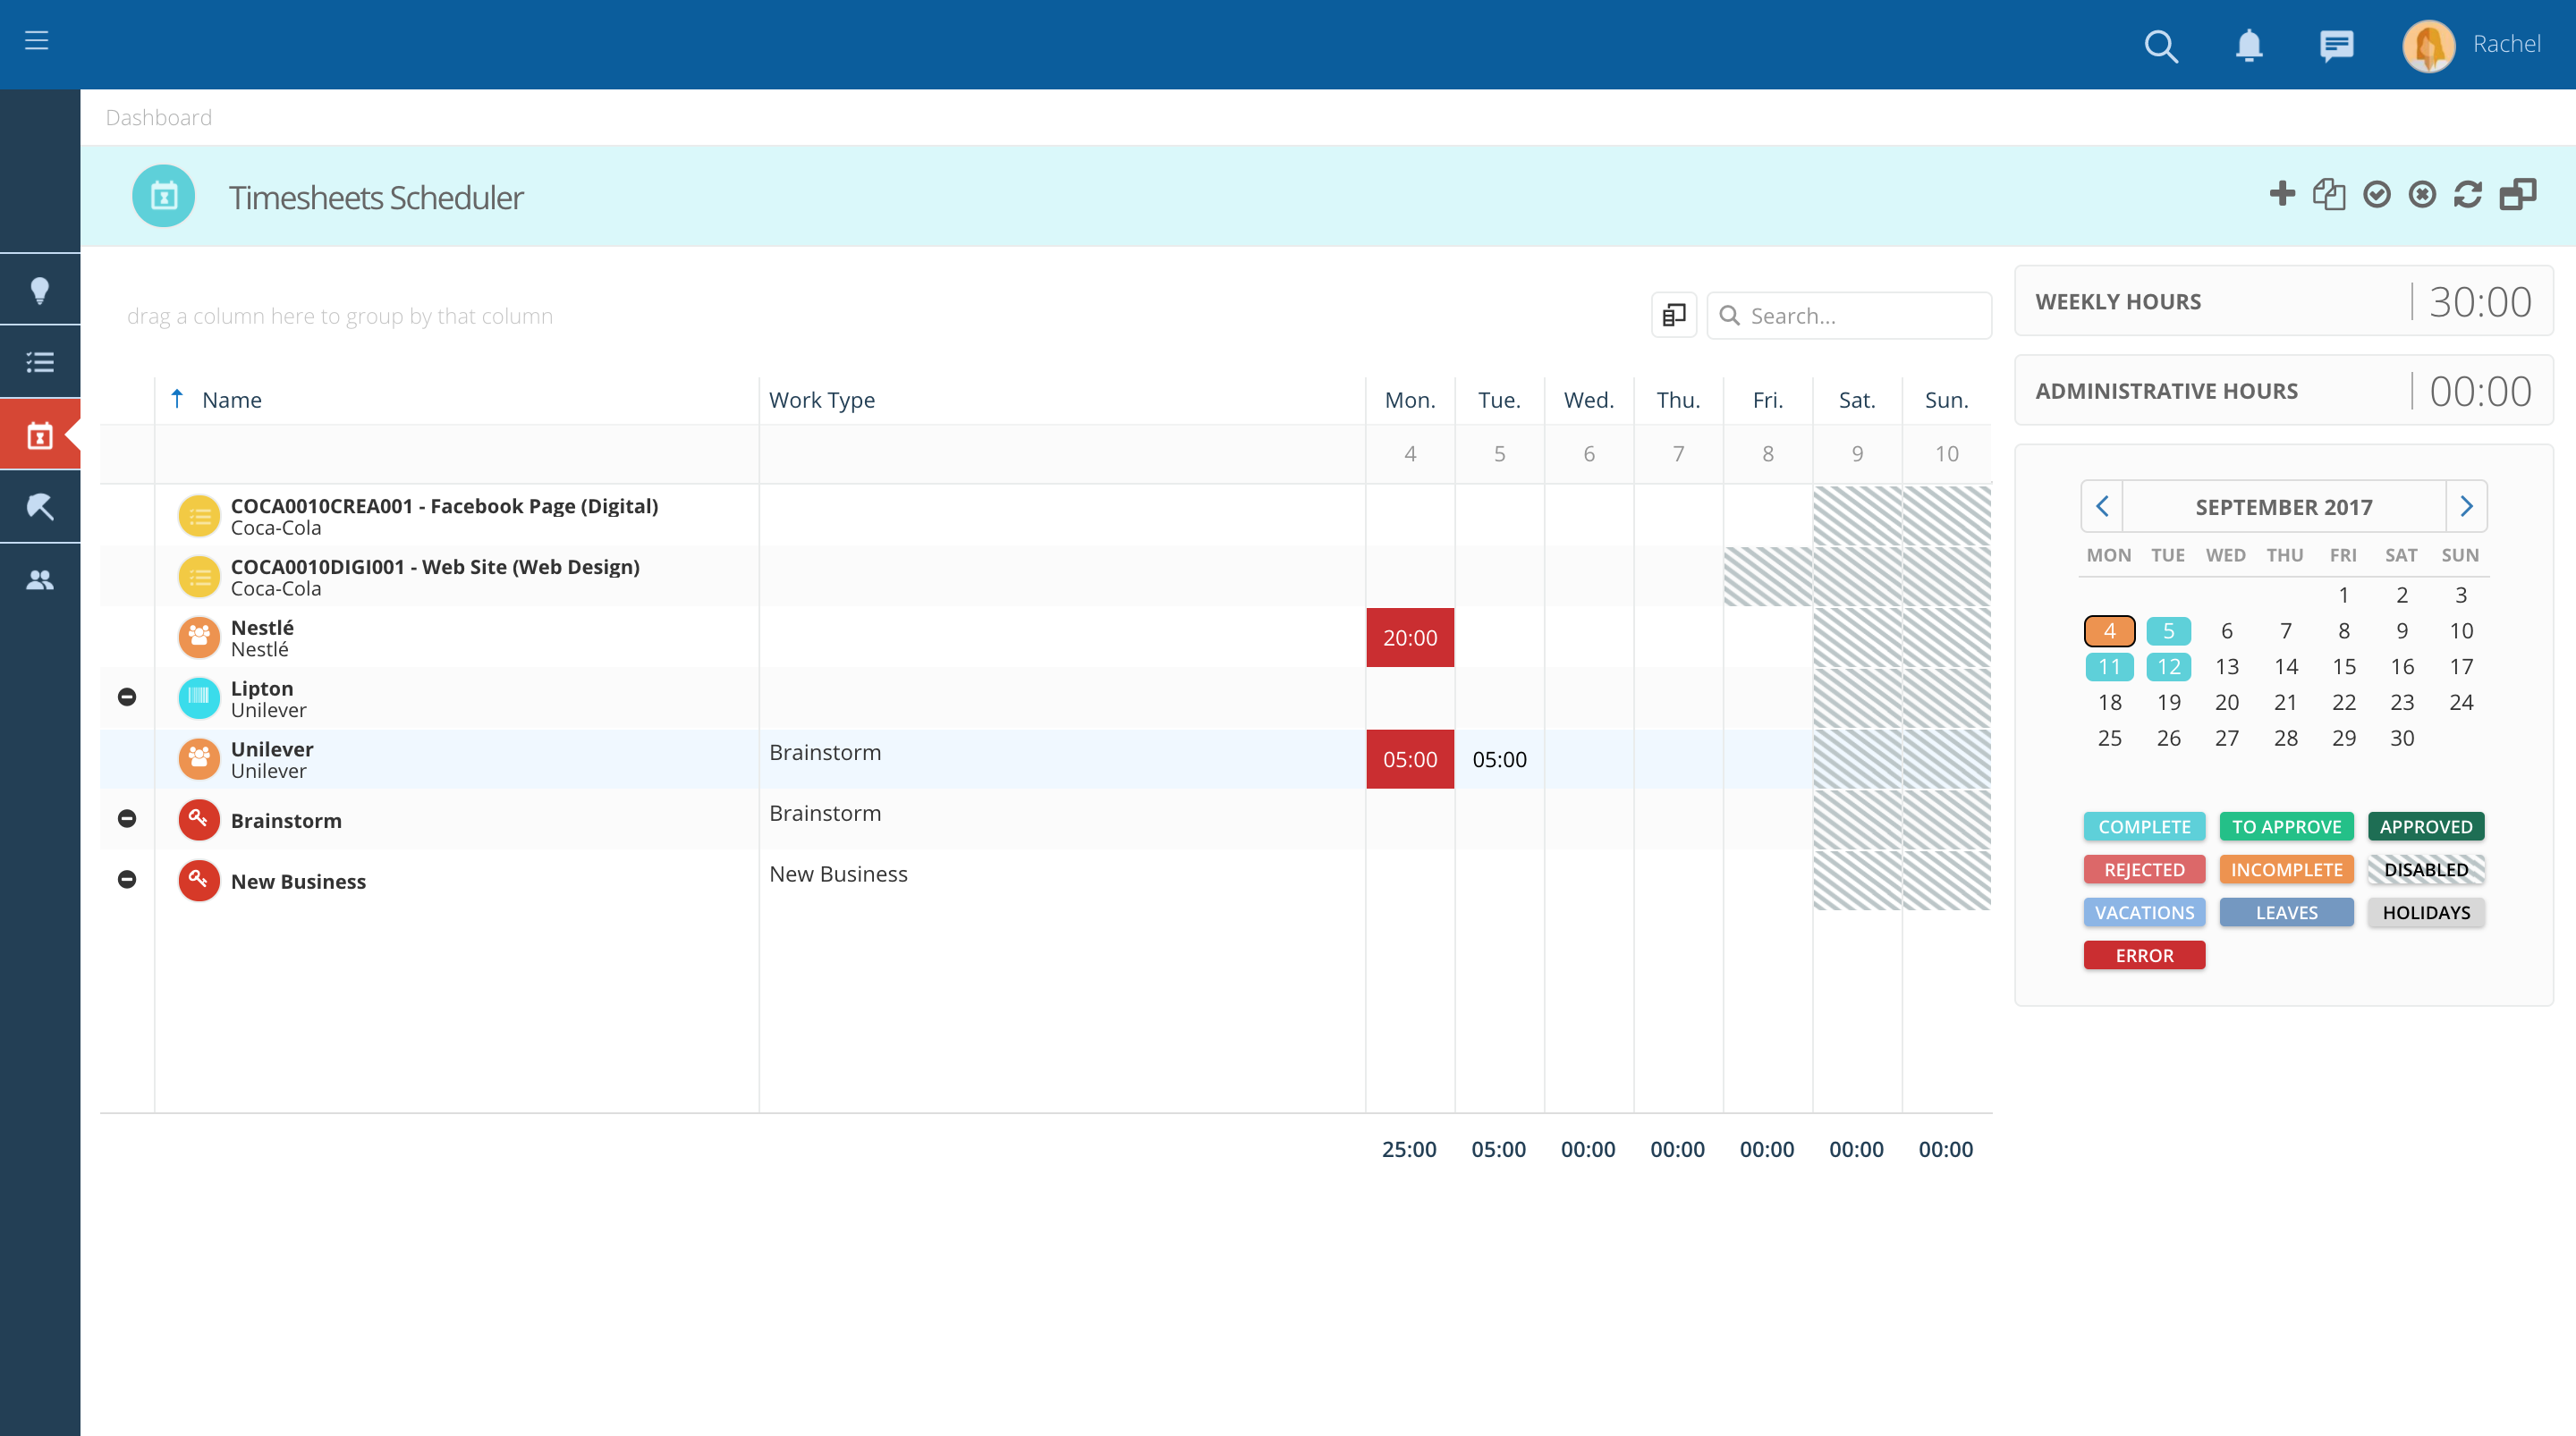
- Once you are ready, submit your timesheet for approval by clicking on the arrow, on the timesheet menu bar.
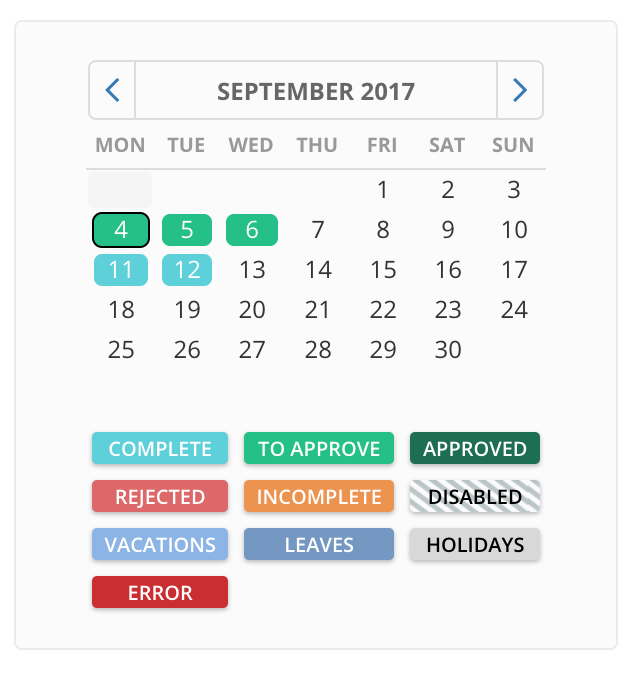
- Verify that the color of the cells changes to light green. Wait for your supervisor to approve your timesheet.

- Check the legend below the calendar for details.
- Verify that there are no incomplete days/weeks.
- Verify that there are no days pending submission for approval (days in blue)
Discover Related Blogs From Industry Experts


Take the Next Step with Skills Workflow
Explore how Skills Workflow can elevate your business.