Microsoft SharePoint
Facilitate content sharing and version control across all business units.



Skills Workflow integrates with Sharepoint.
The integration allows you to:
- Create automatically and organize a file structure in SharePoint
- Access to the folders and files available in SharePoint
- Have your team get quick and easy access to the files in Sharepoint
- Share the direct link to the files in Sharepoint in comments
Process
Files
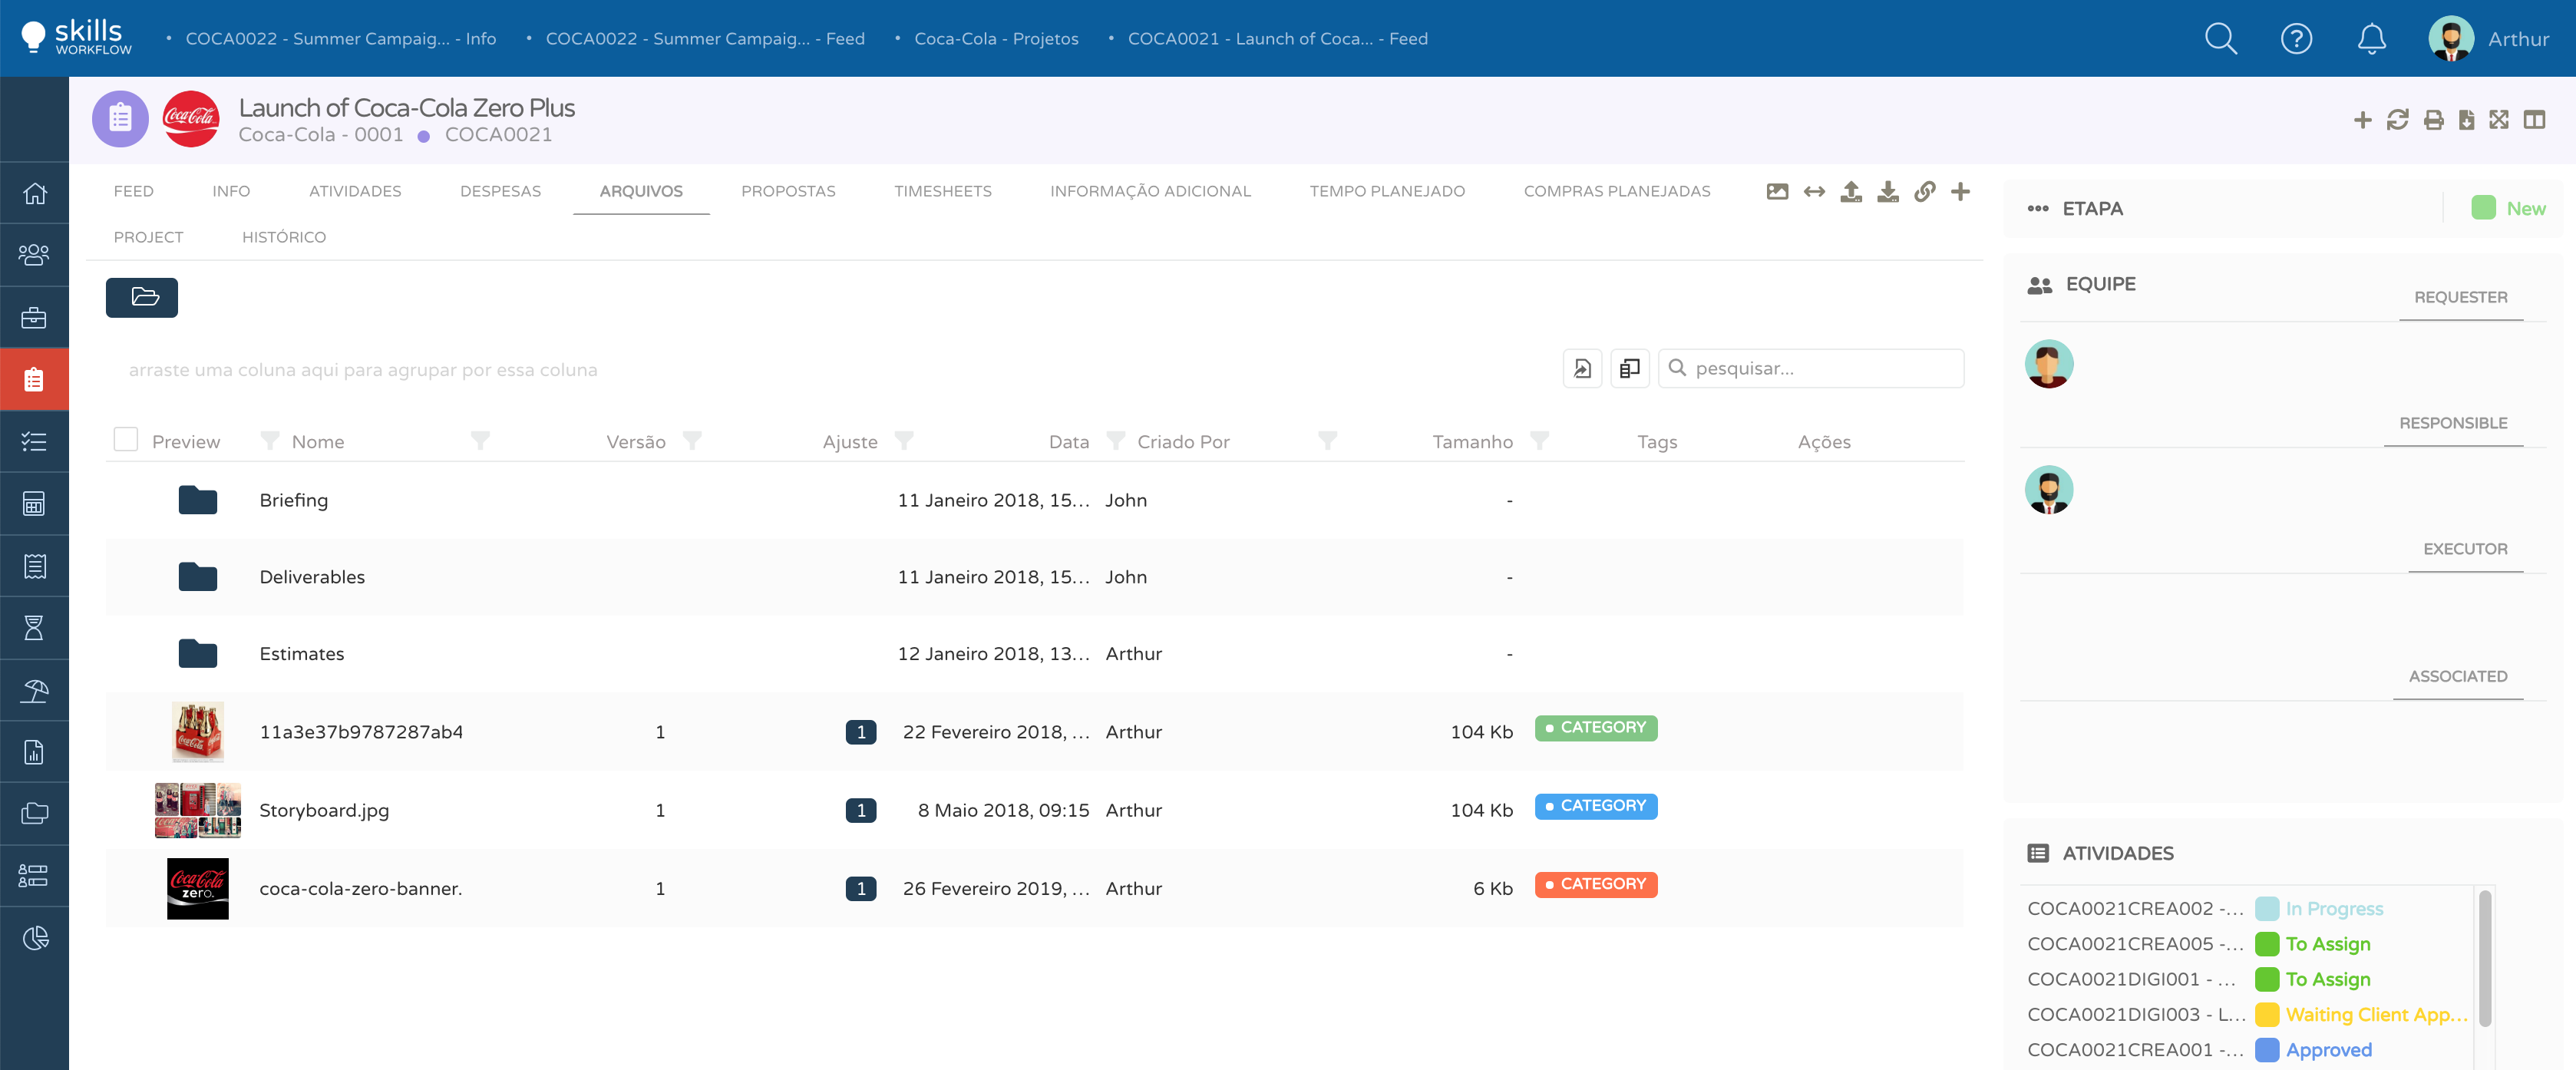
When a file is uploaded into SharePoint, it is automatically available in Skills Workflow.
- You can share your file by going into your document and easily select the file
- It will be available to add it into the document's description
- Or to post it on the document's feed When a file is uploaded in a comment from the Hard Drive:
- The file is uploaded to SharePoint
- A link is created and posted in the comment
- A thumbnail will be also available in the comment
Mappings
Sharepoint integration requires mappings between:
- Client and Sharepoint Site
- Project and Sharepoint Sub-Site
- File's Tag and Category

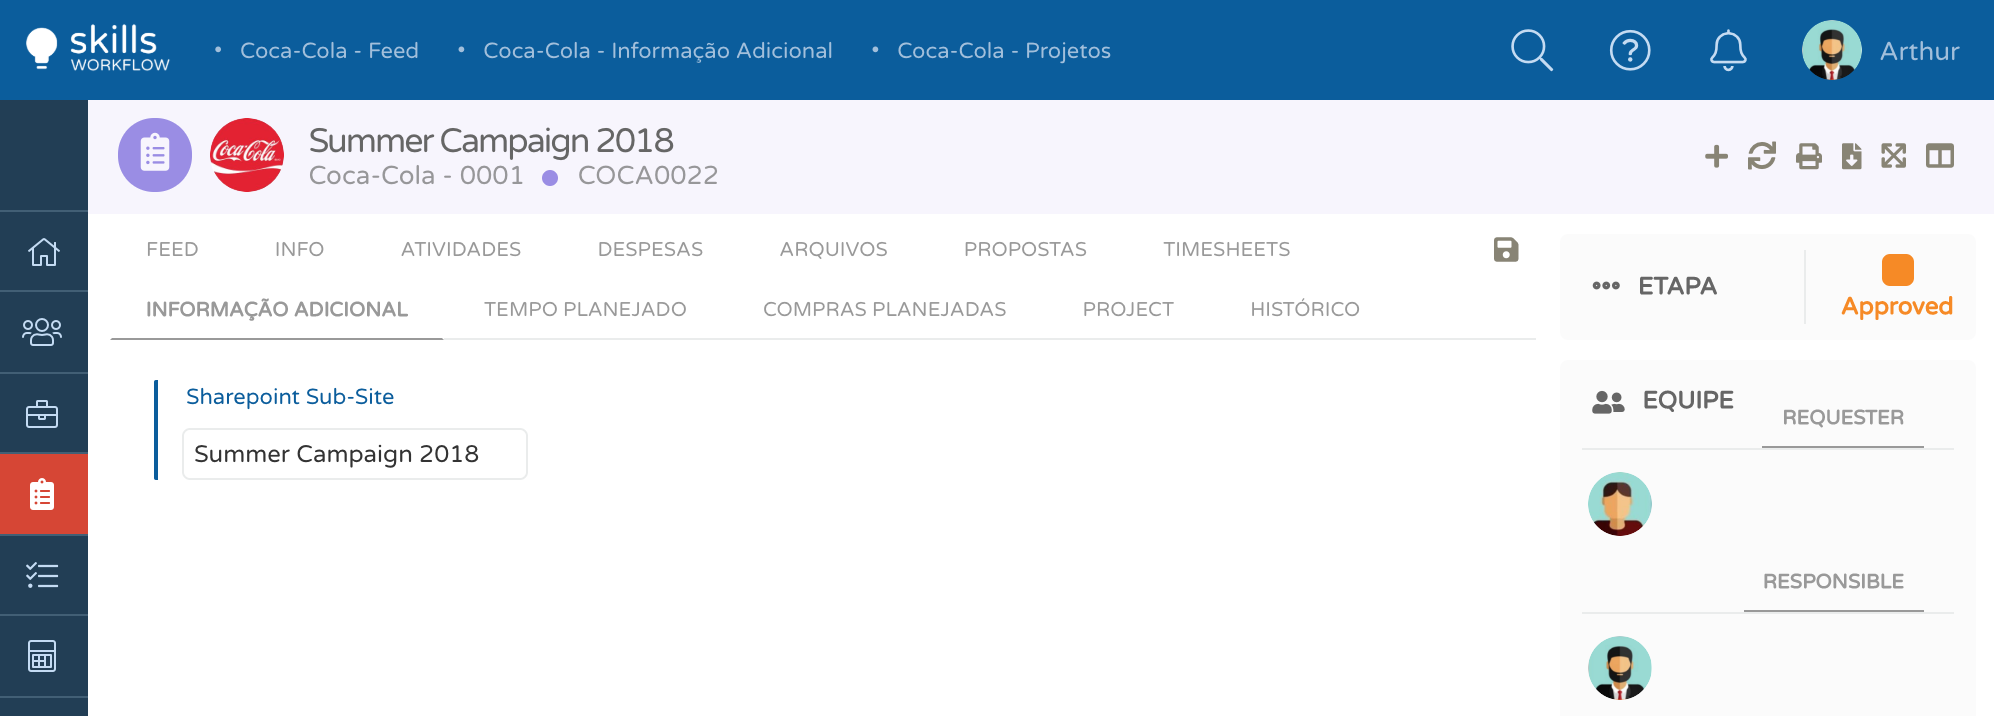
Files
When a file is uploaded in Skills Workflow, it will be available on the corresponding Sharepoint Sub-Site.
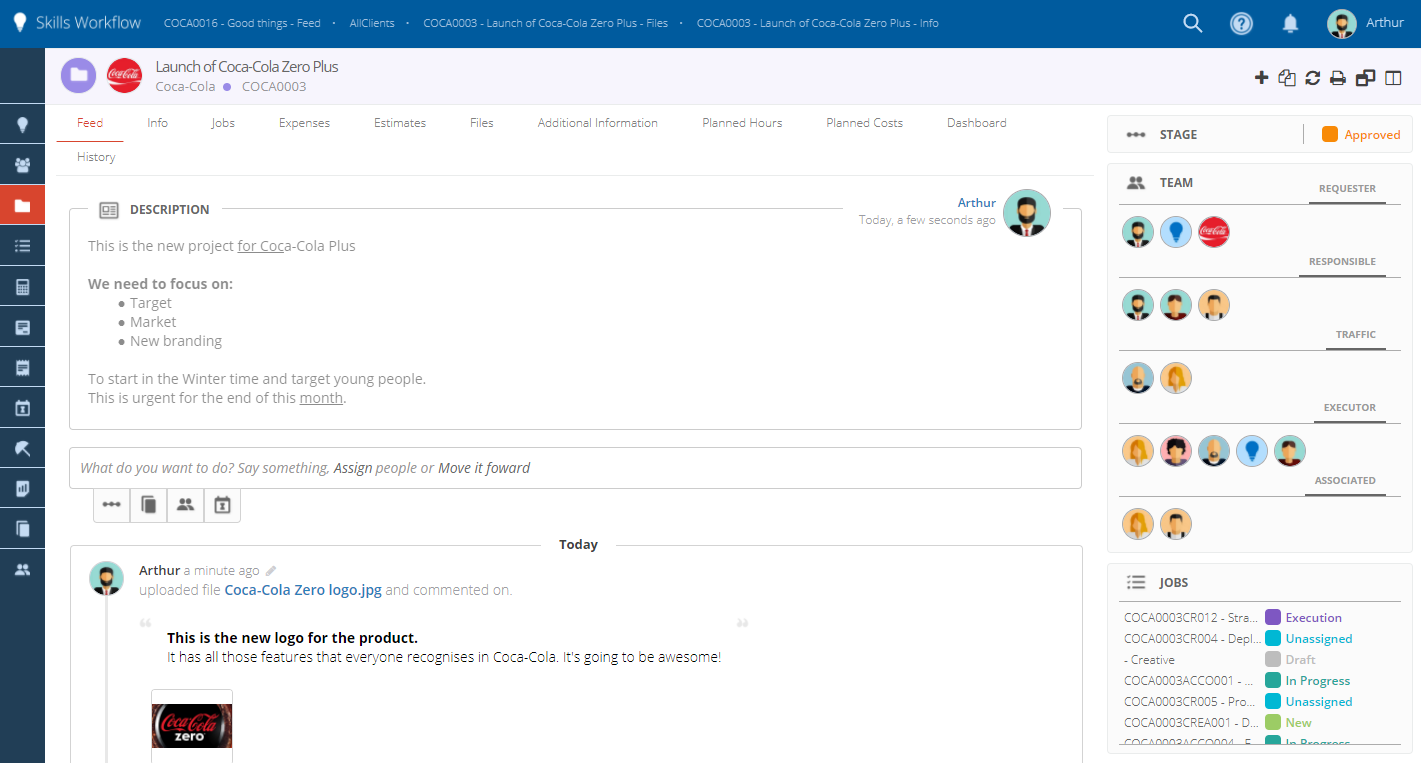
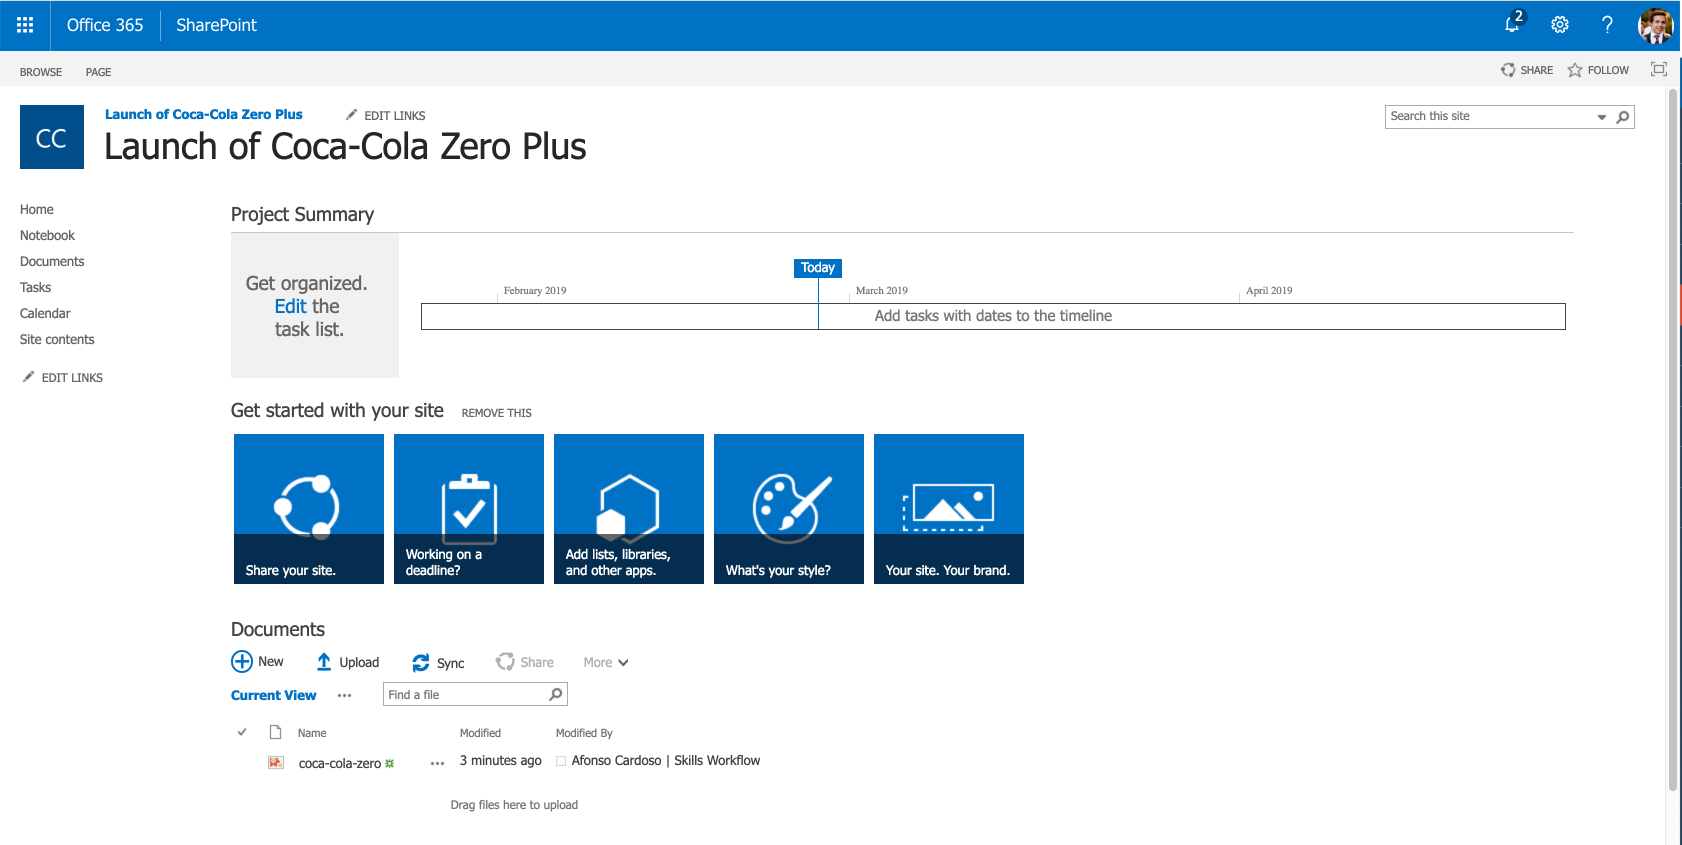
Whenever a document is created in Skills Workflow, a folder is created under its parent document folder. The structure of the folders in Skills Workflow is:
- Root
- Client (Sharepoint Site)
- Project (Sharepoint Sub-Site)
Synching
The synching is performed by a background process. Whenever a document is created or his folder name is changed in Skills Workflow, the process will replicate it in Sharepoint.
- The synching process is from Skills Workflow to Sharepoint
- Skills Workflow has a reference of the ID of the files and folders in SharePoint
- The users will see the same file structure (starting on the root) in both systems
Configurations
Auth
The integration with SharePoint requires:
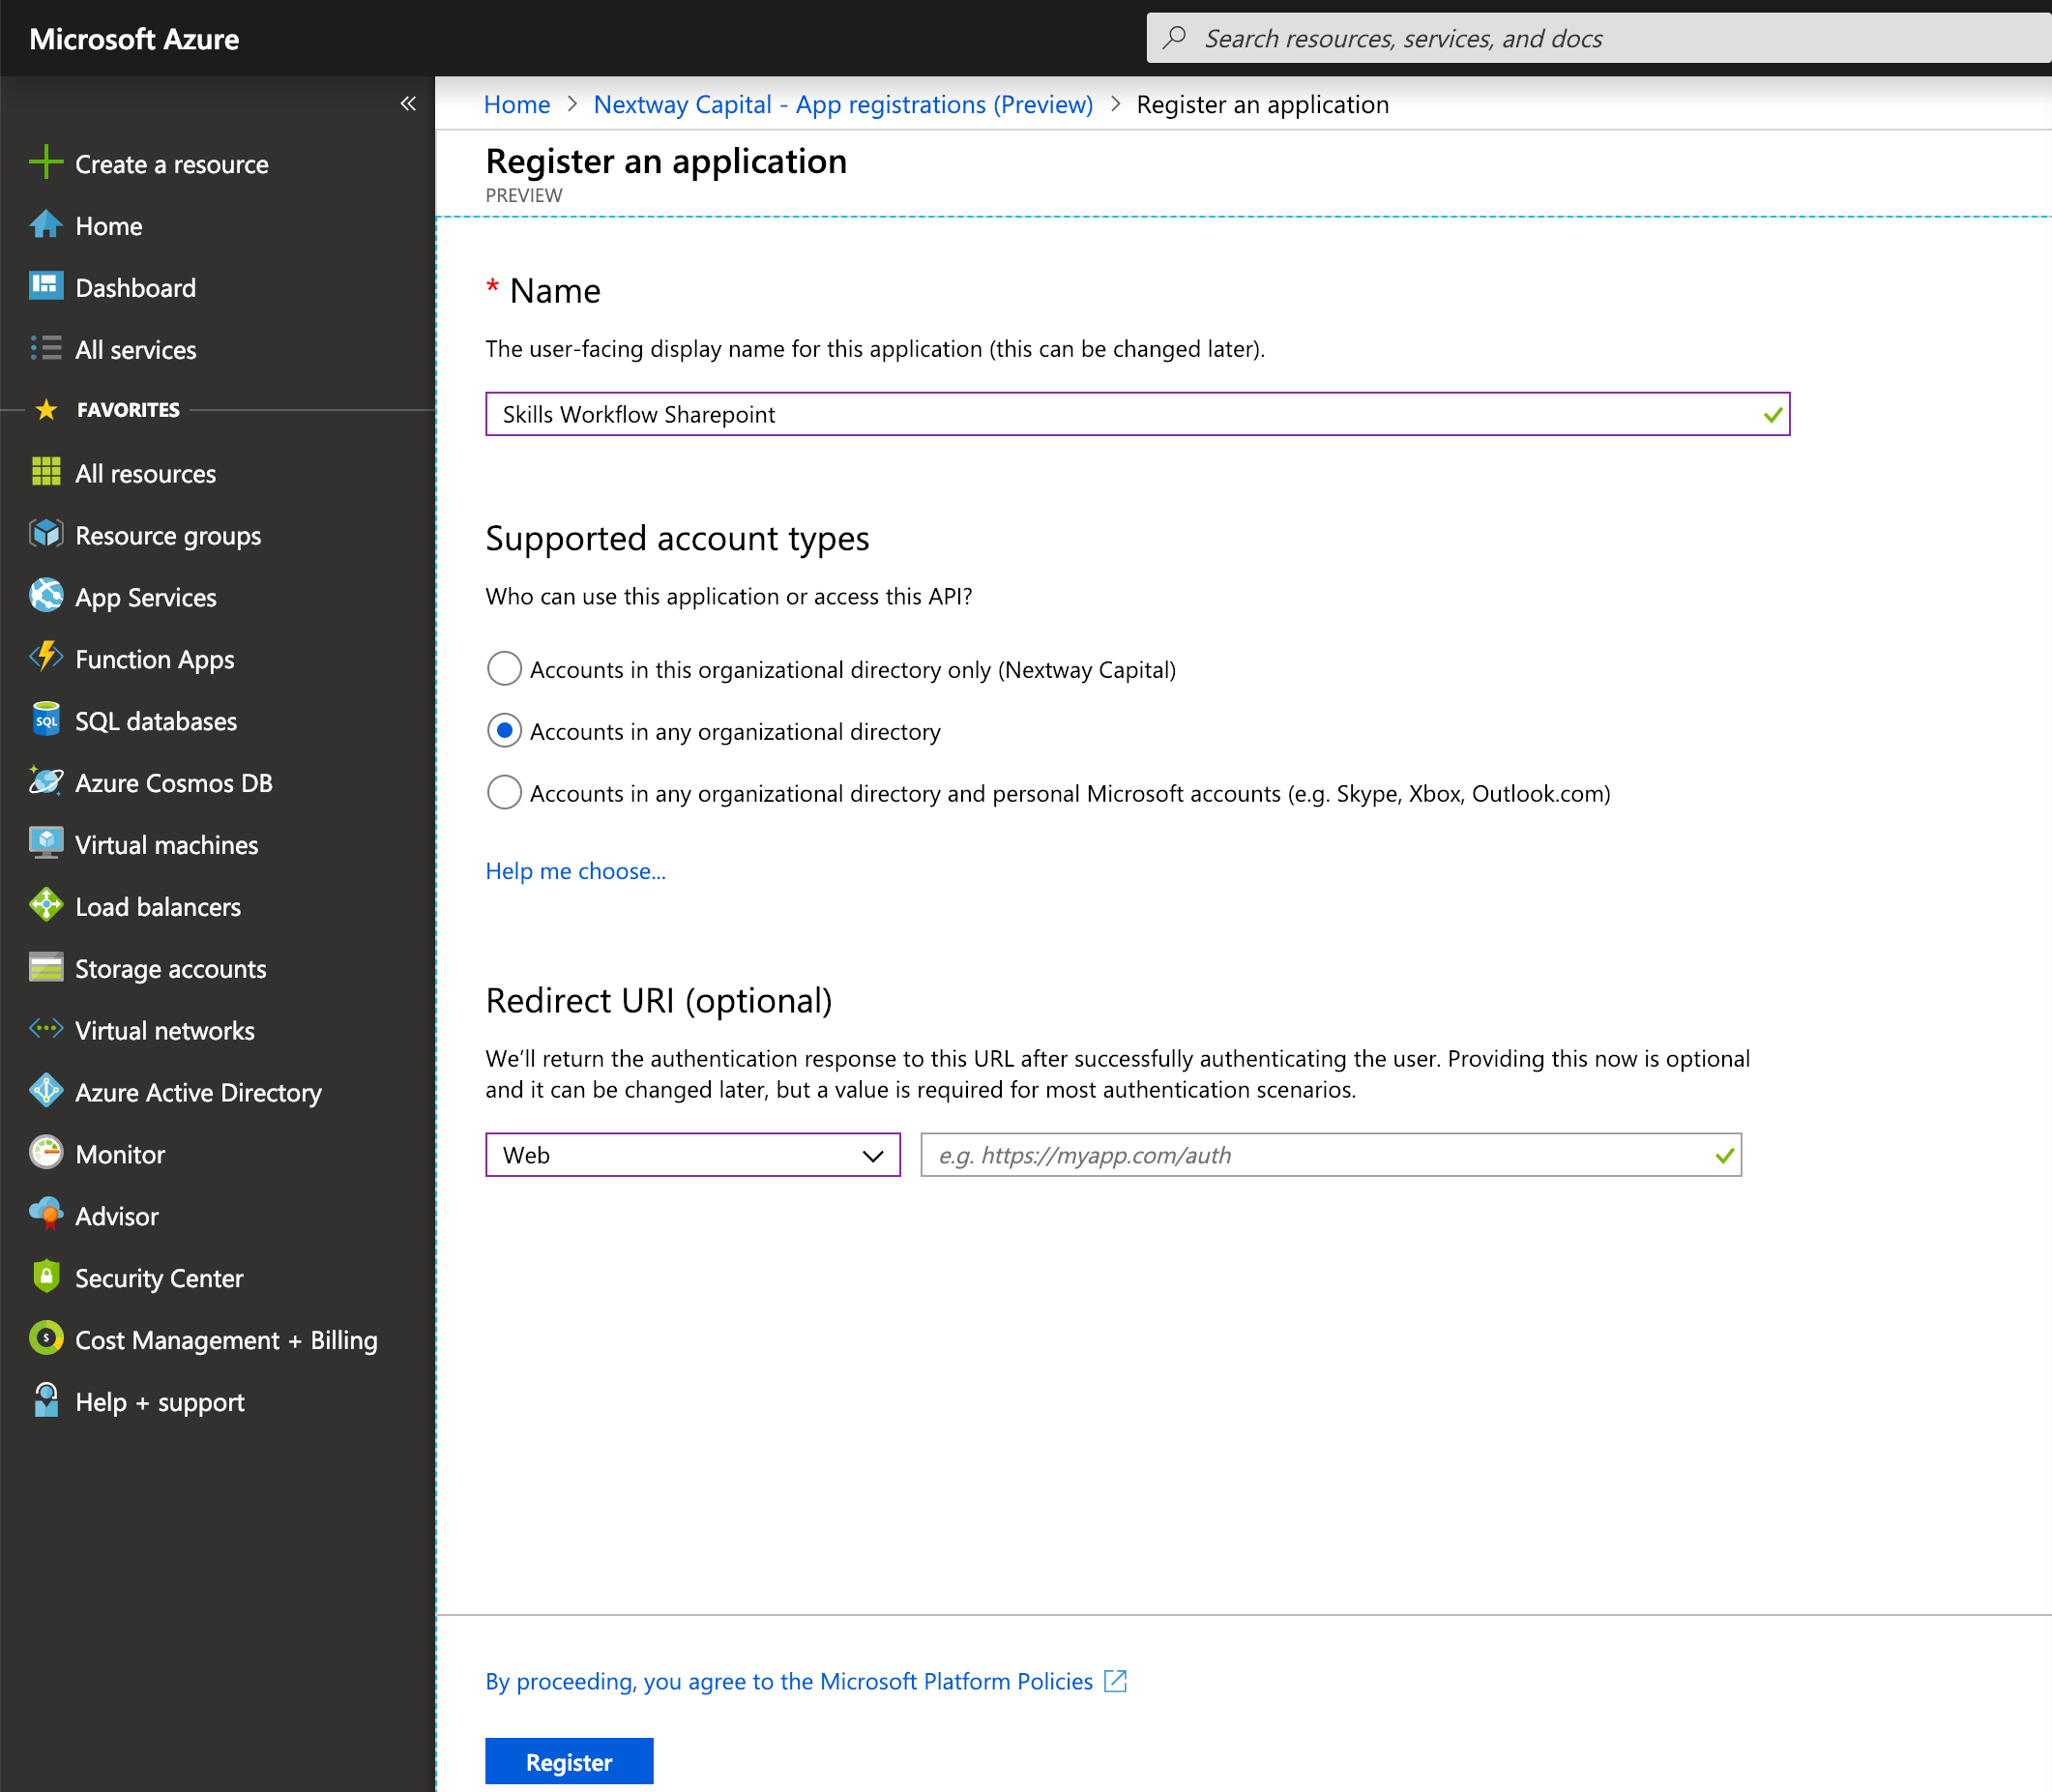
- An application registration in the Azure Active Directory
- Application (client) ID
- Directory (tenant) ID
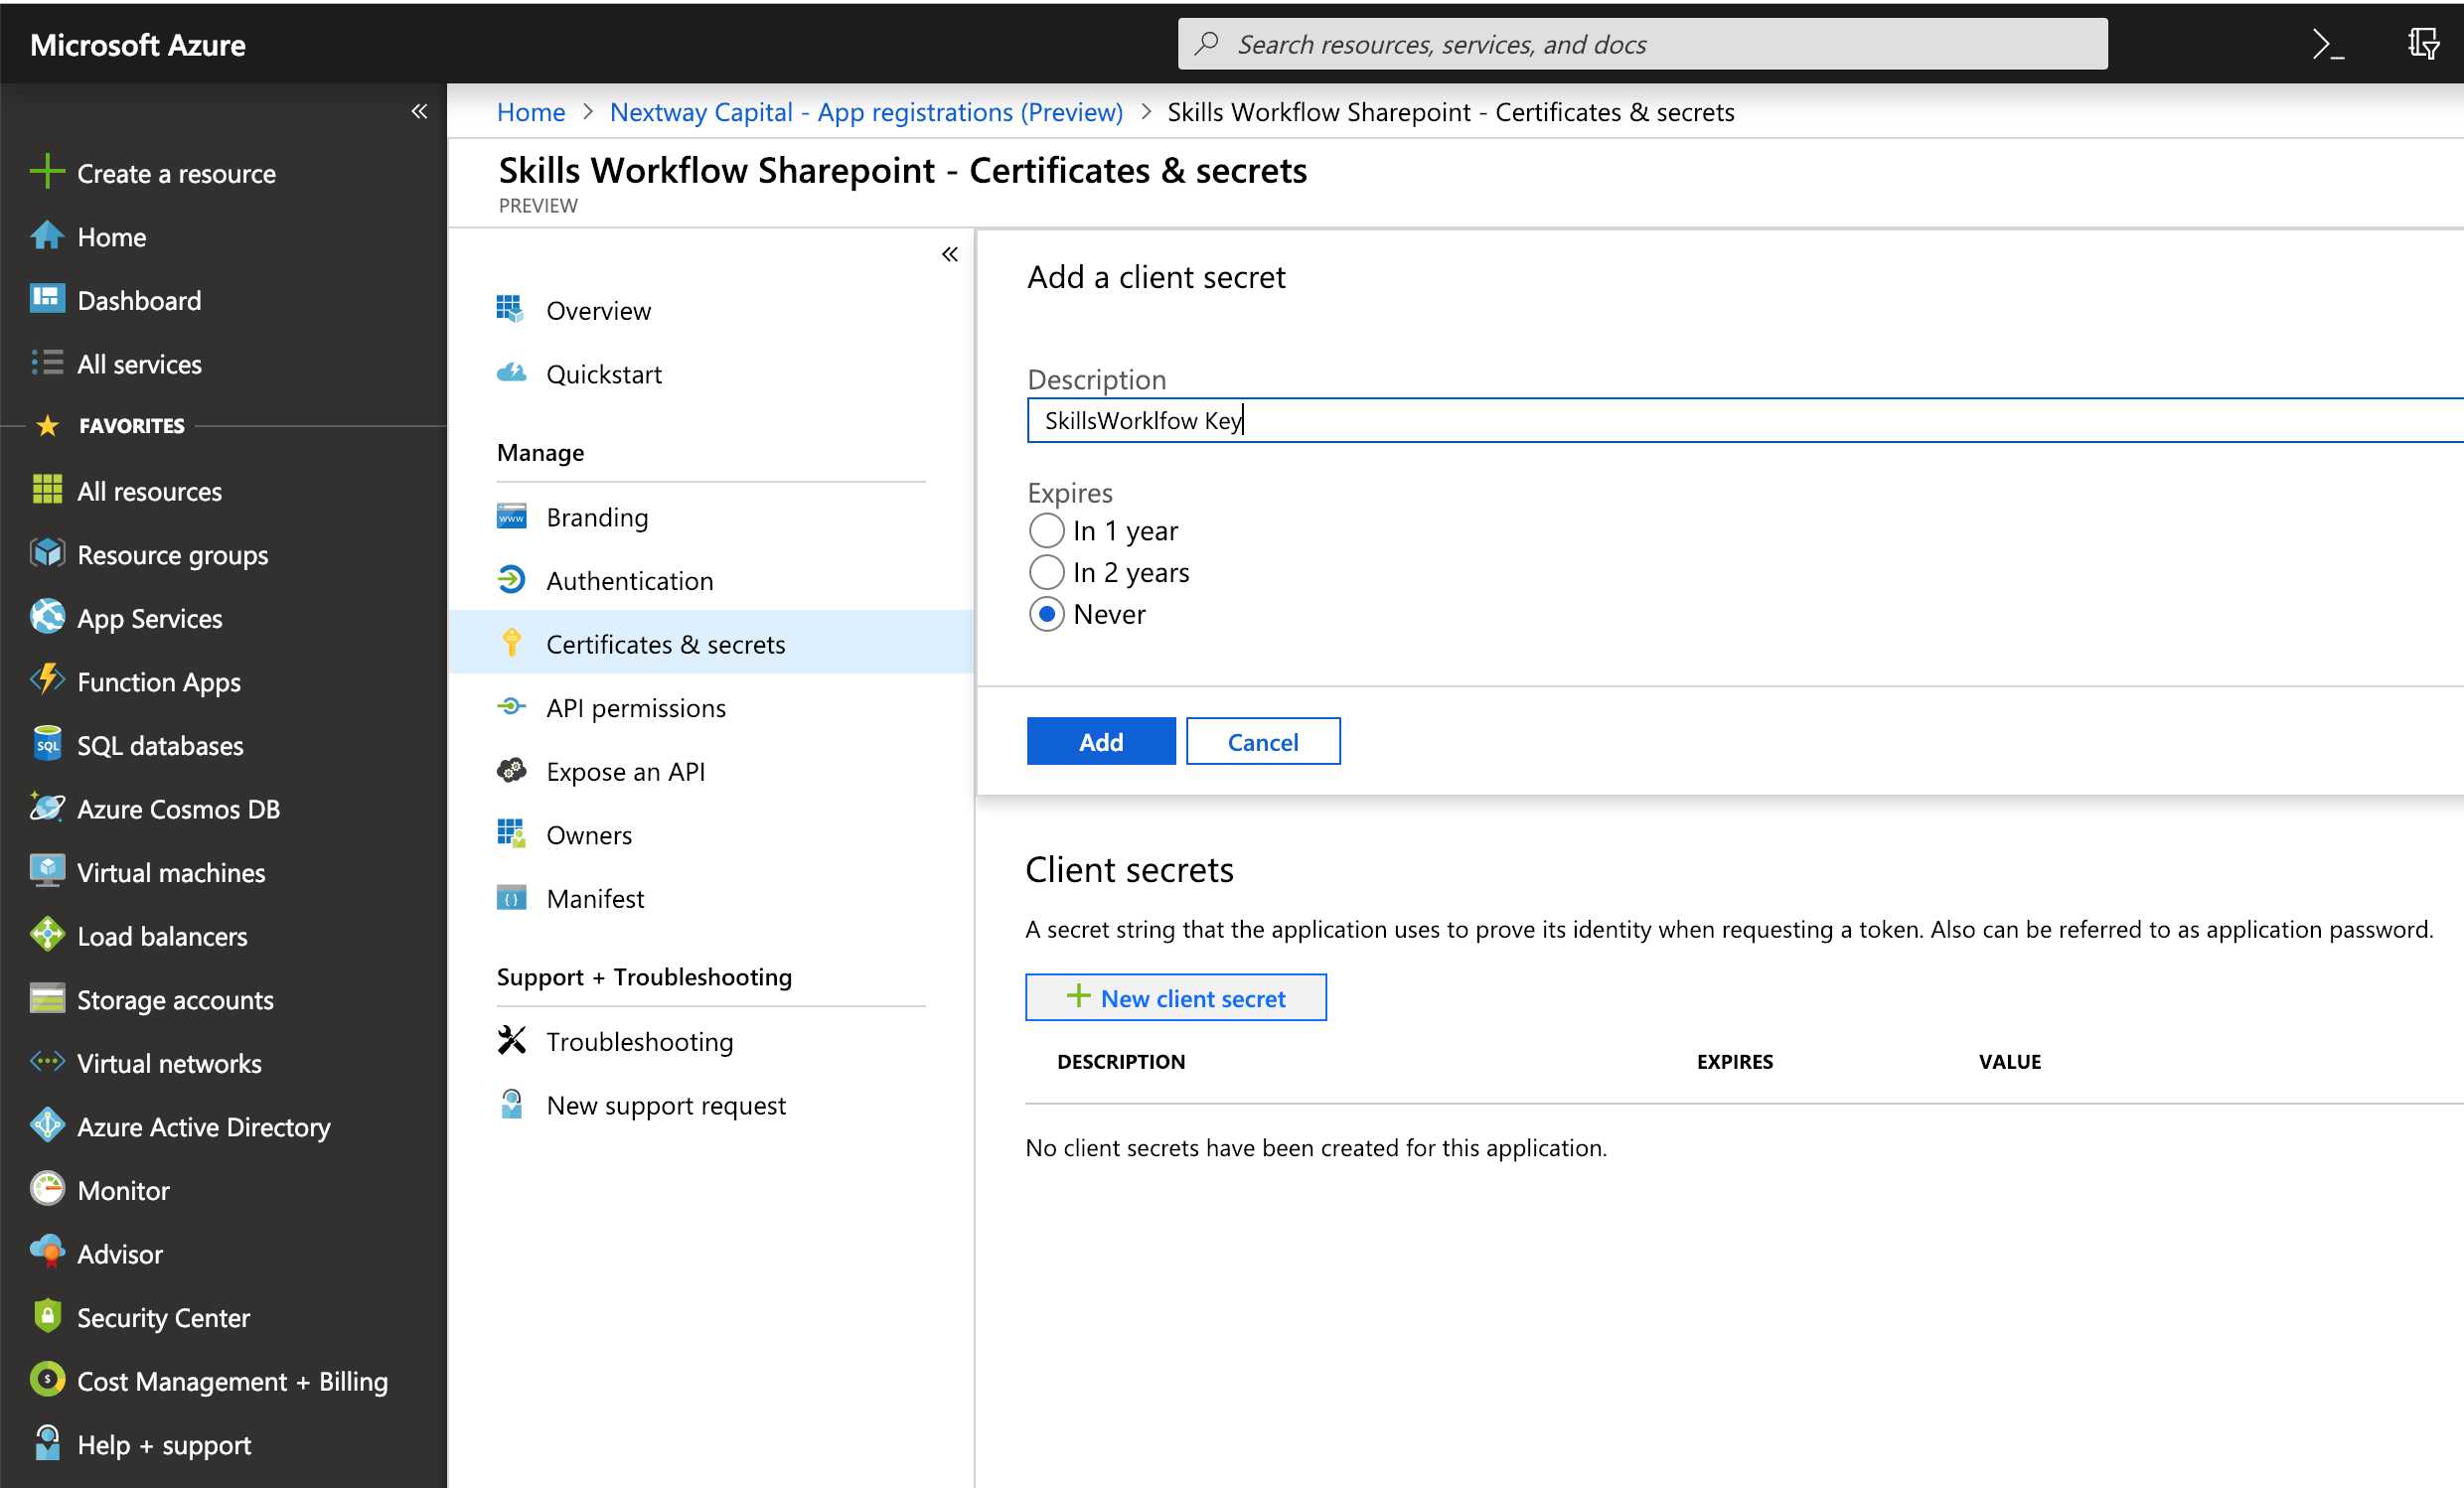
- Client secret
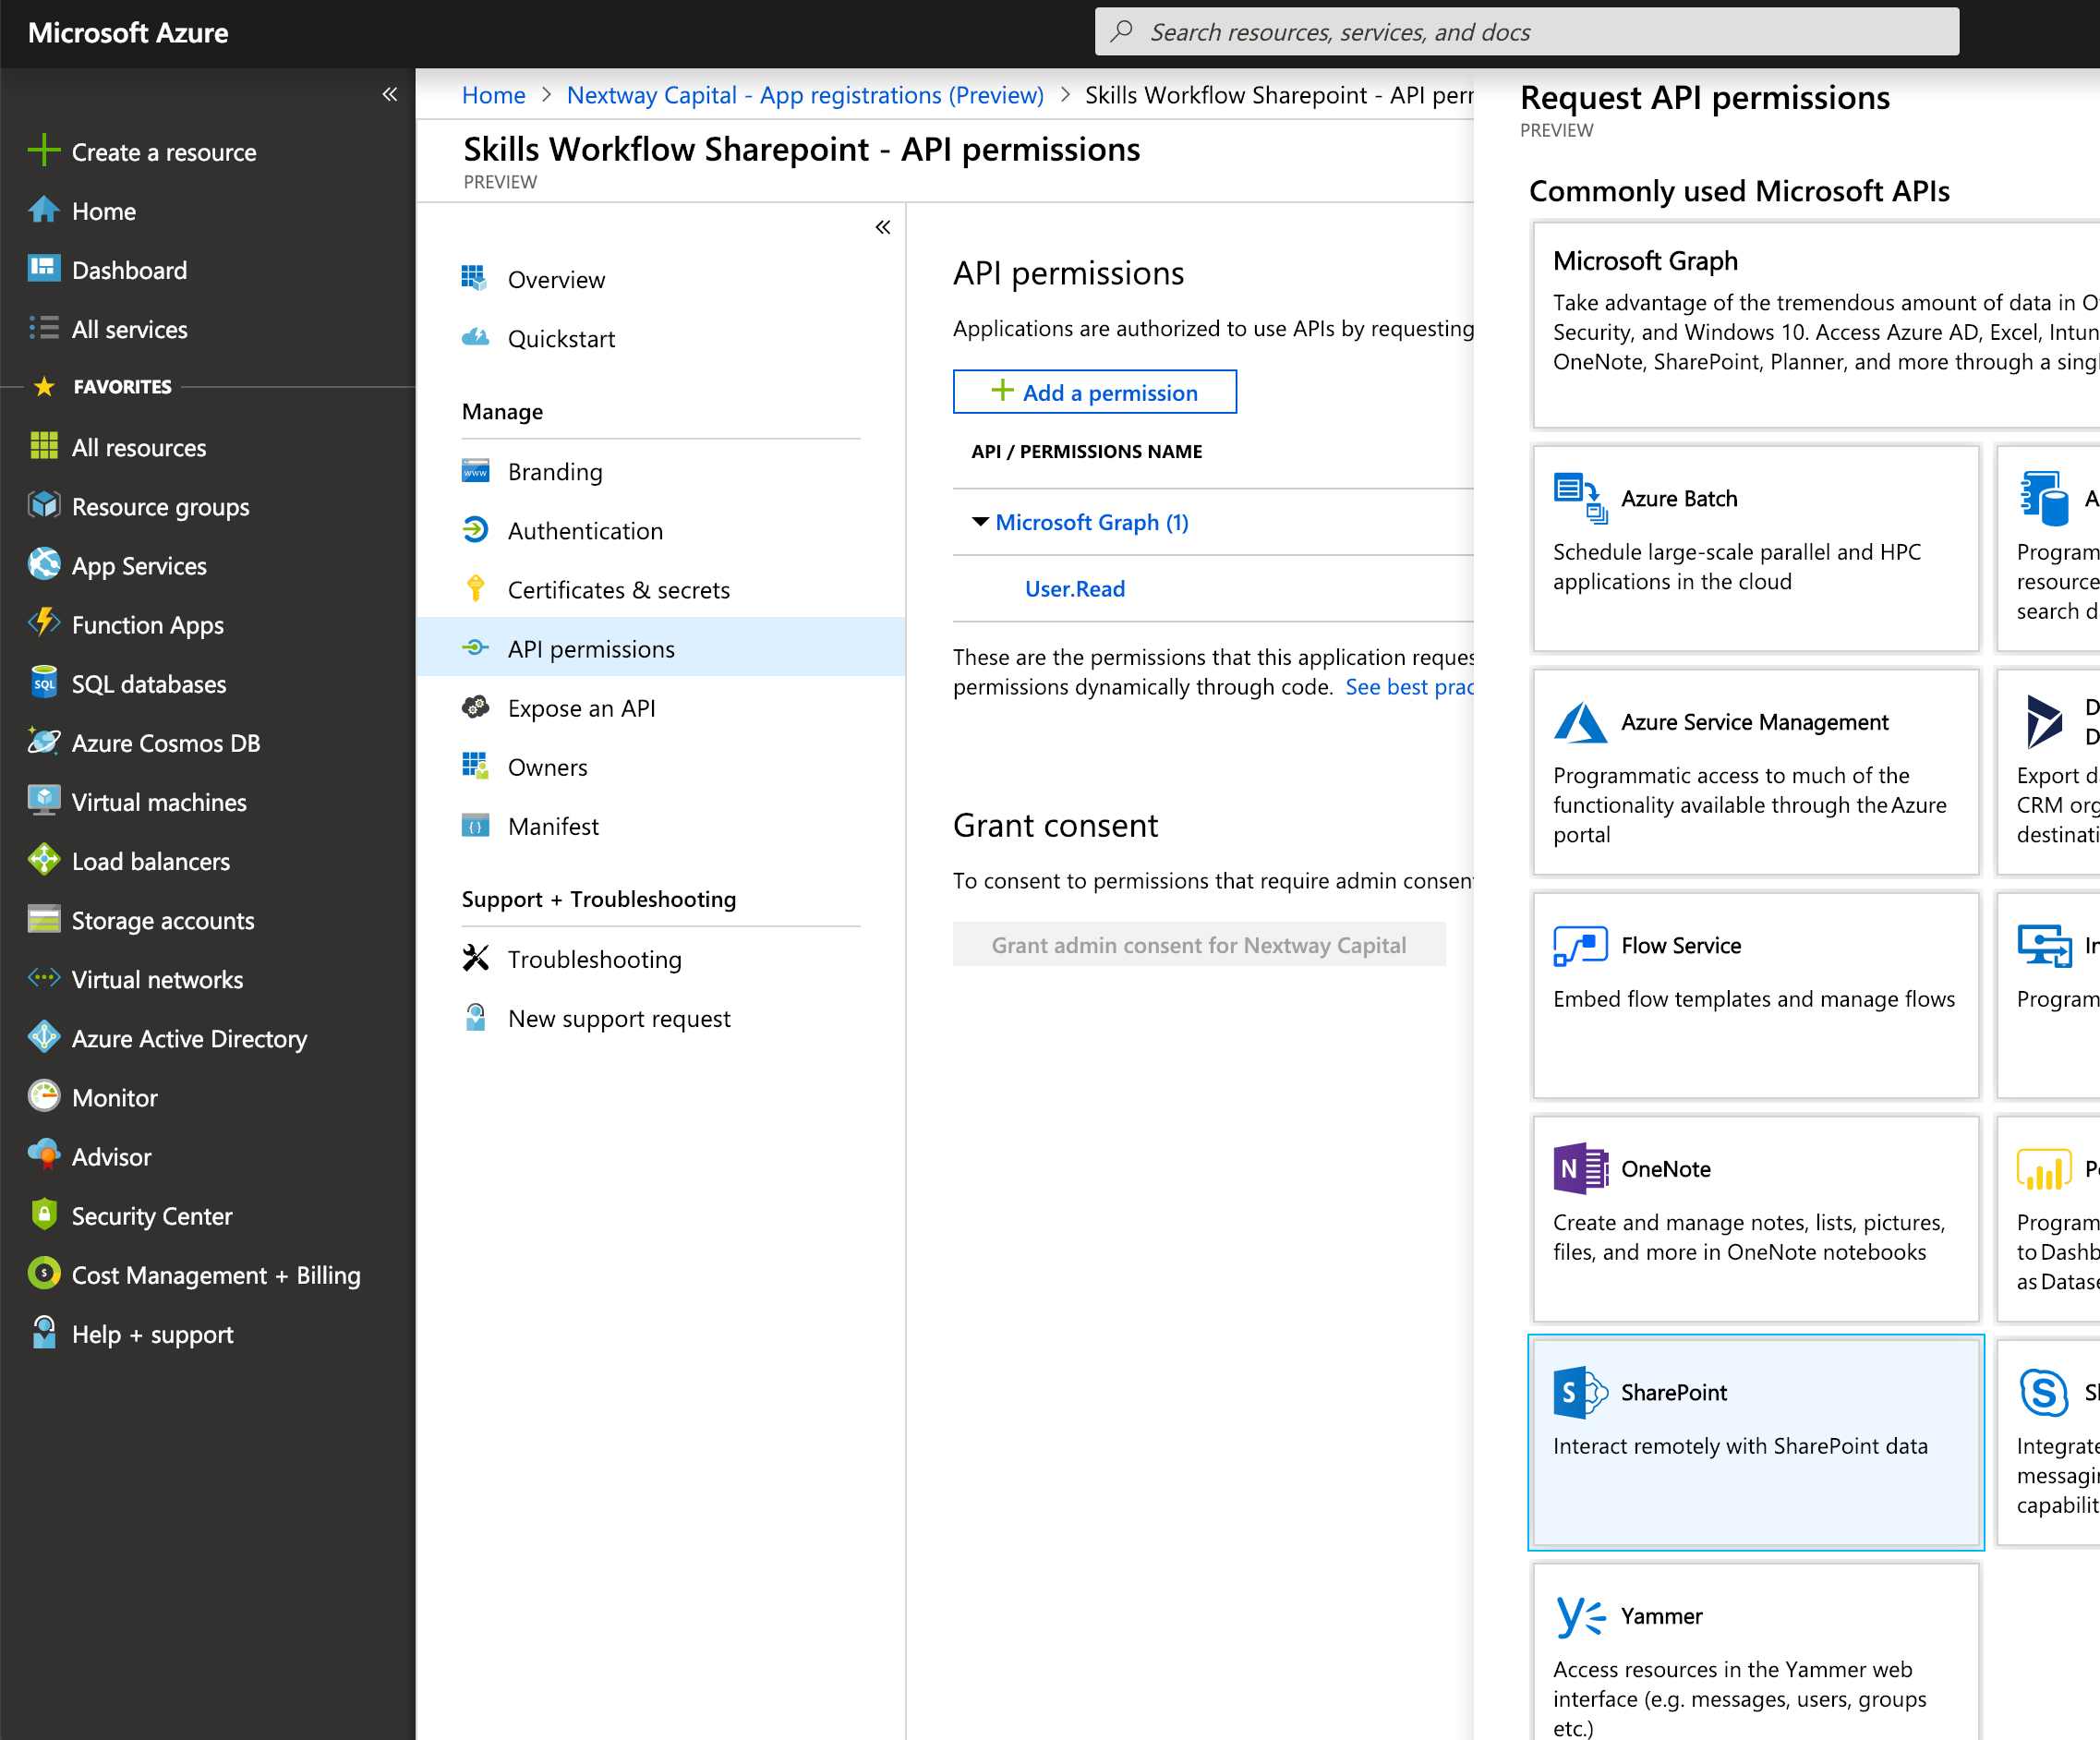
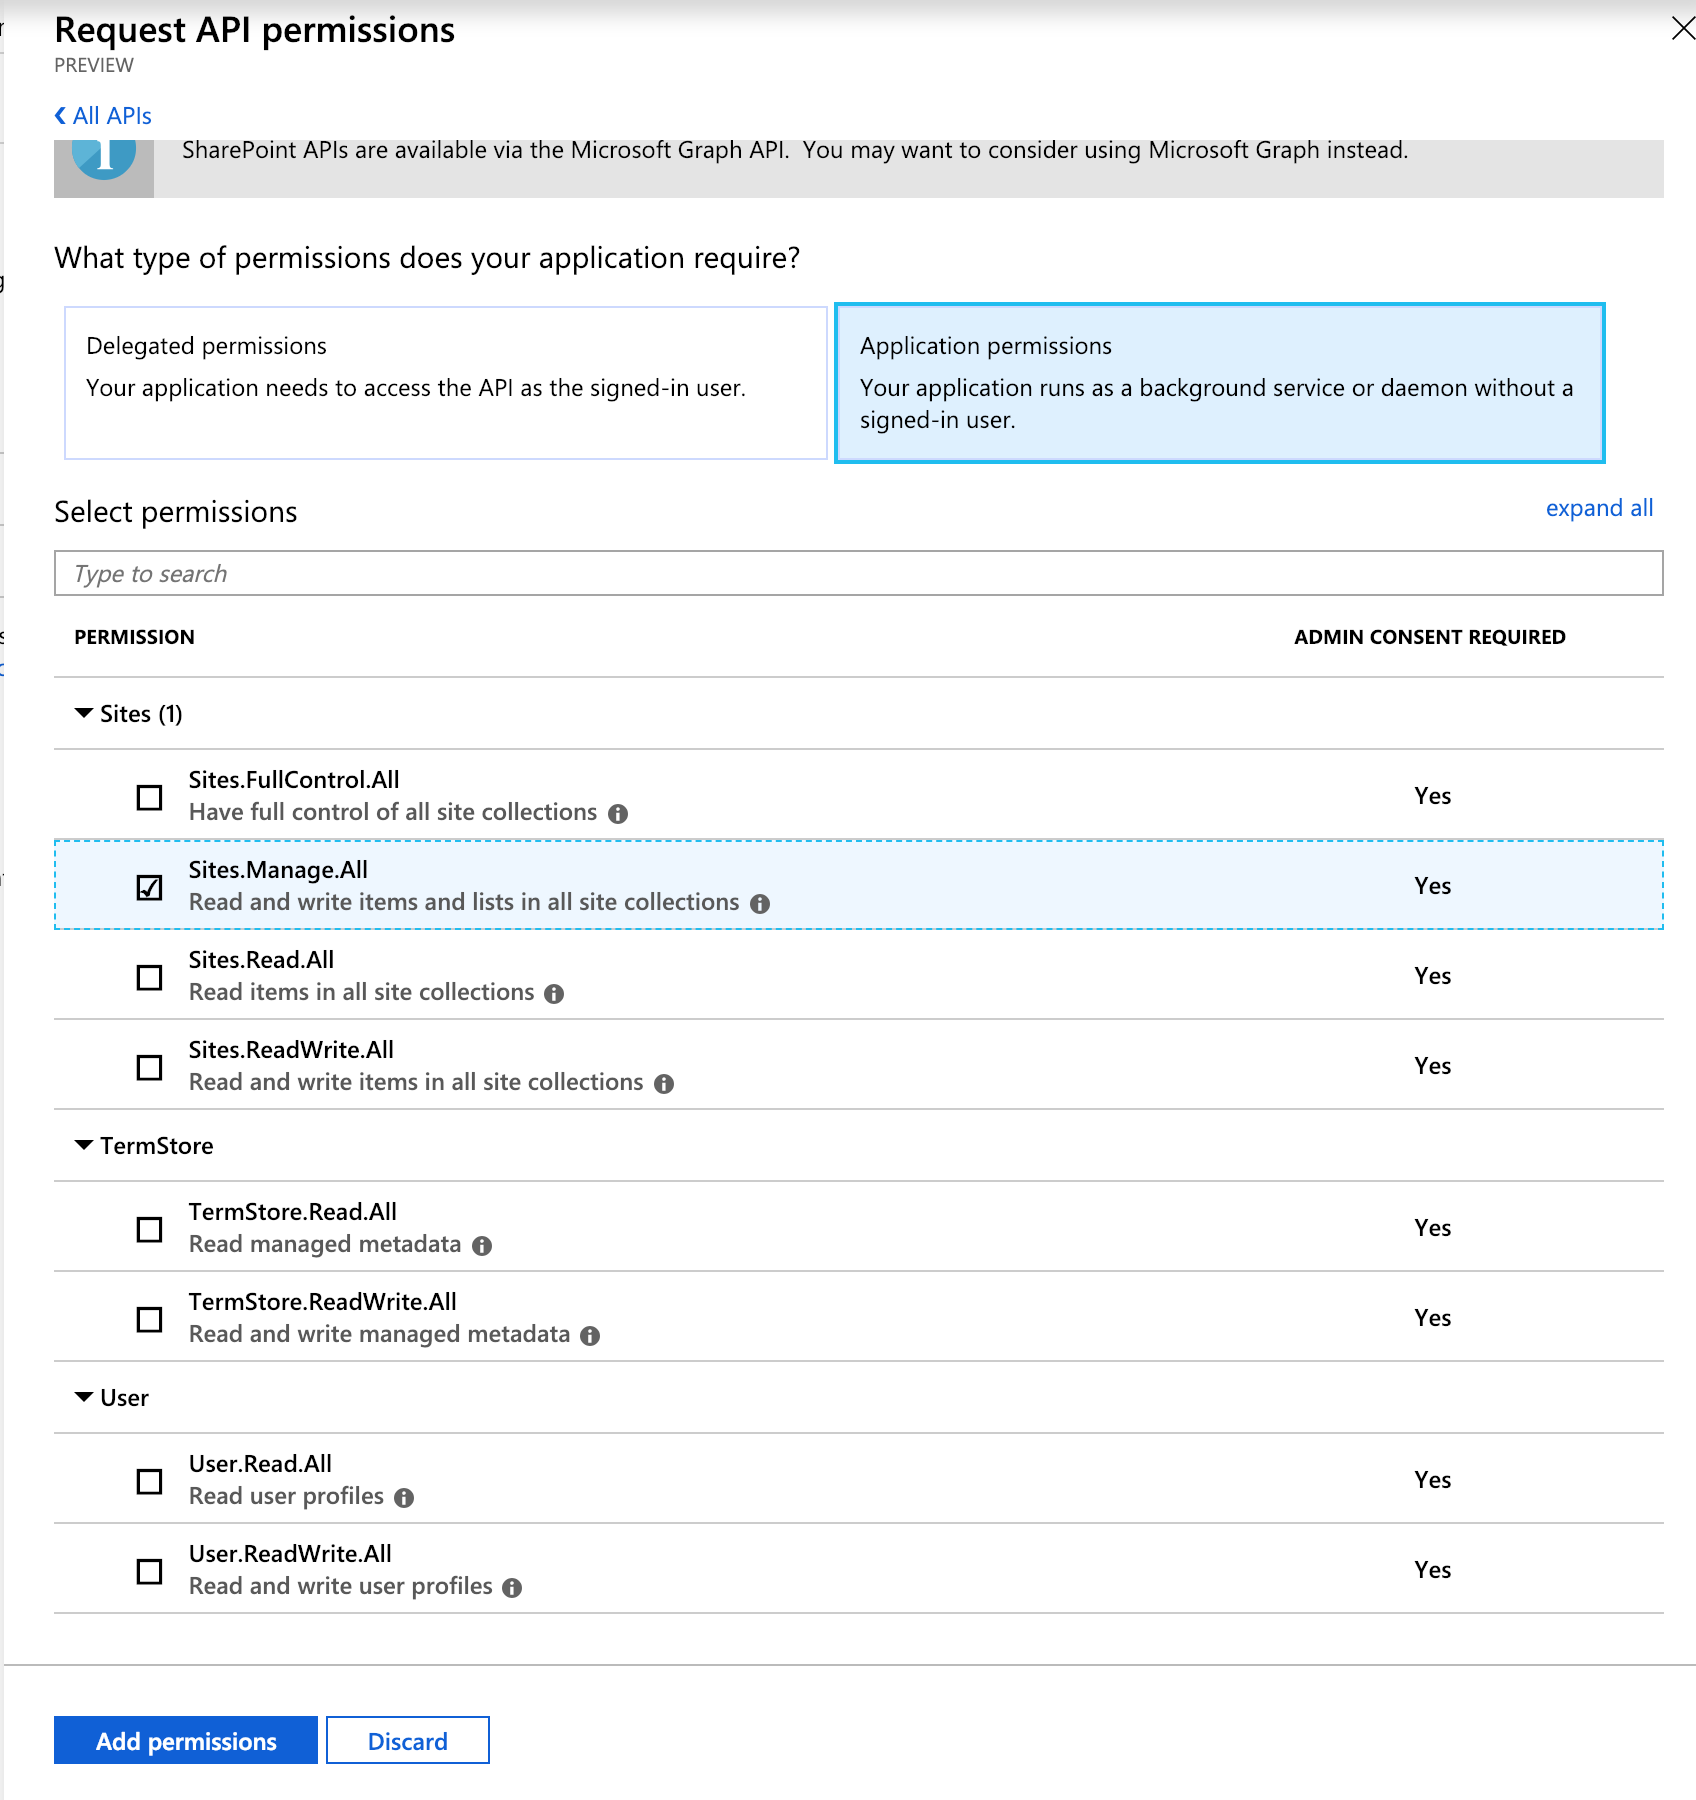
- API permission to the Sharepoint Please check below step by step how to configure an App:
- Access into the Azure AD and create a new App with the following details
- Create client secret
- Add to the App the API permission to your manage your SharePoint
Take the Next Step with
Skills Workflow
Explore how Skills Workflow can elevate your business.


